

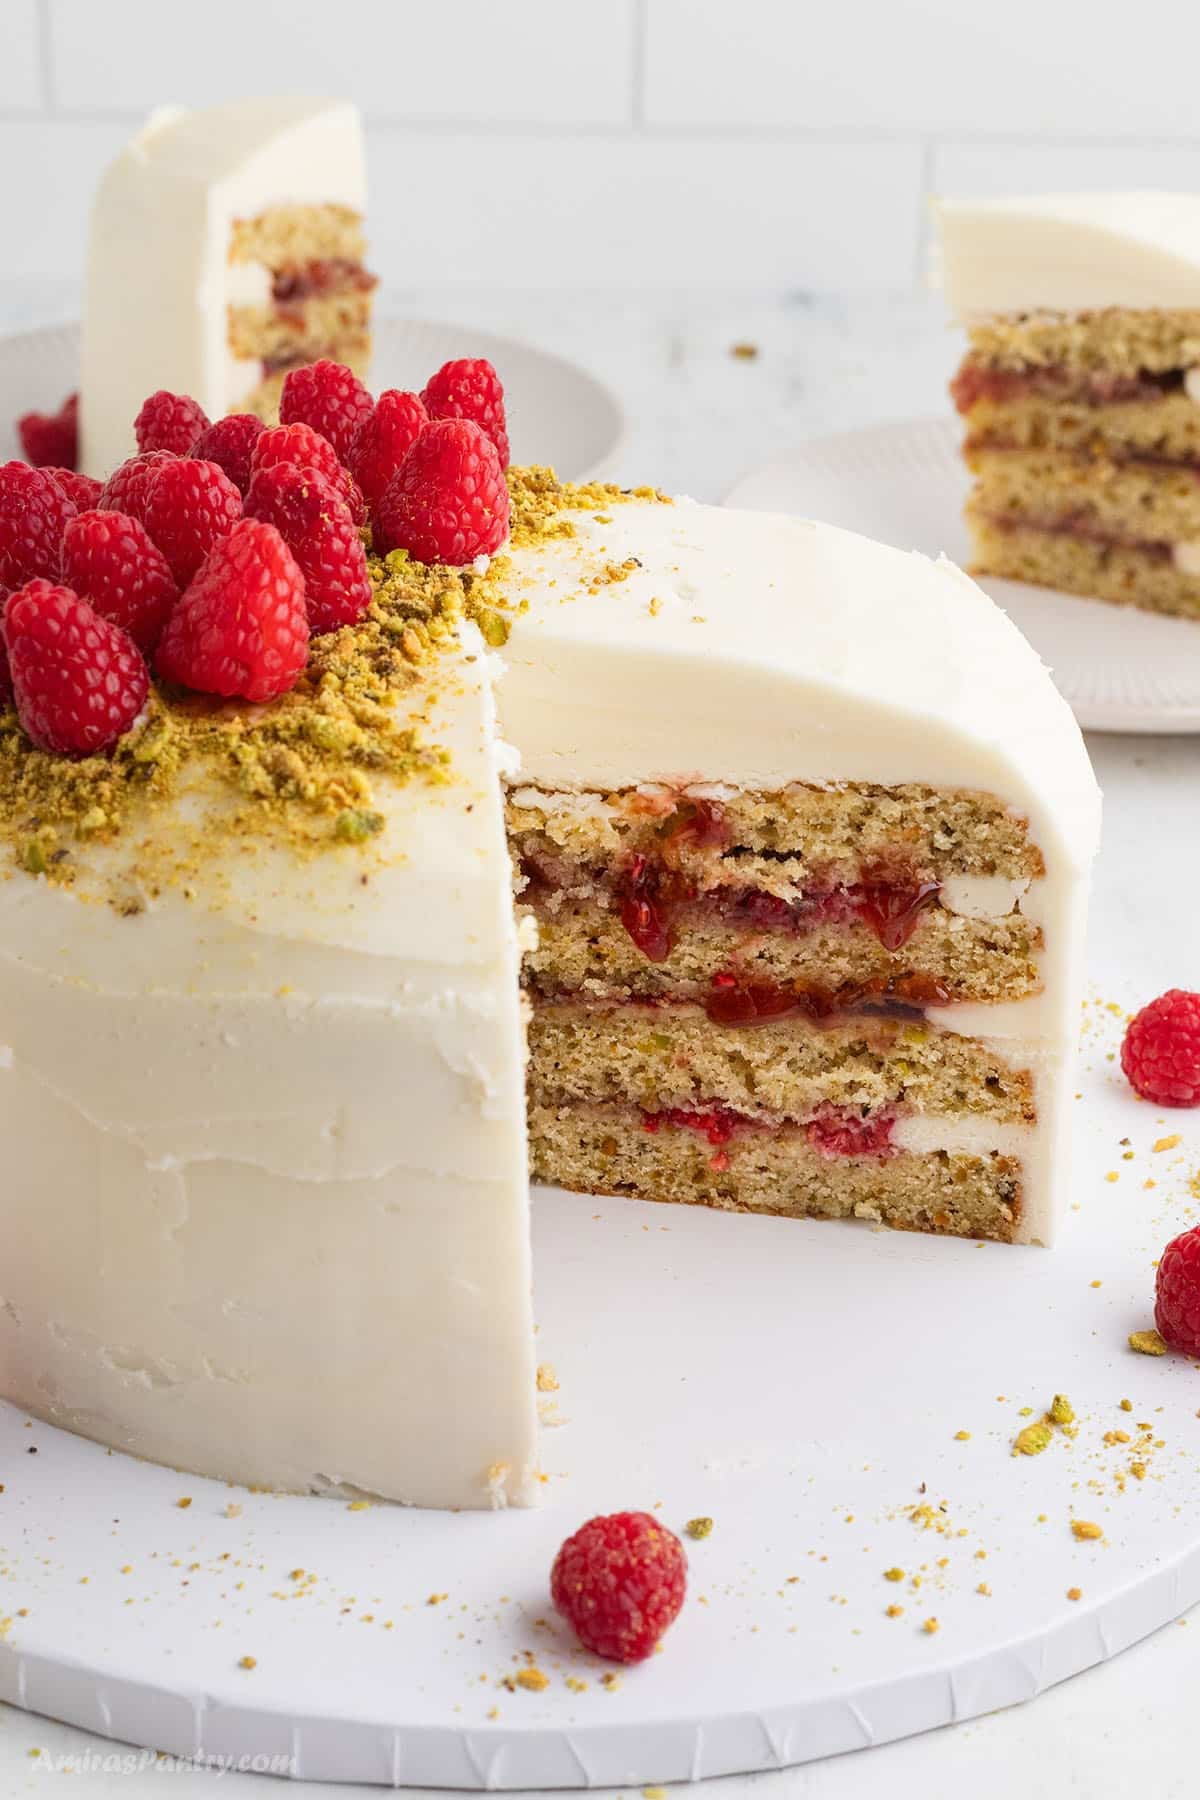
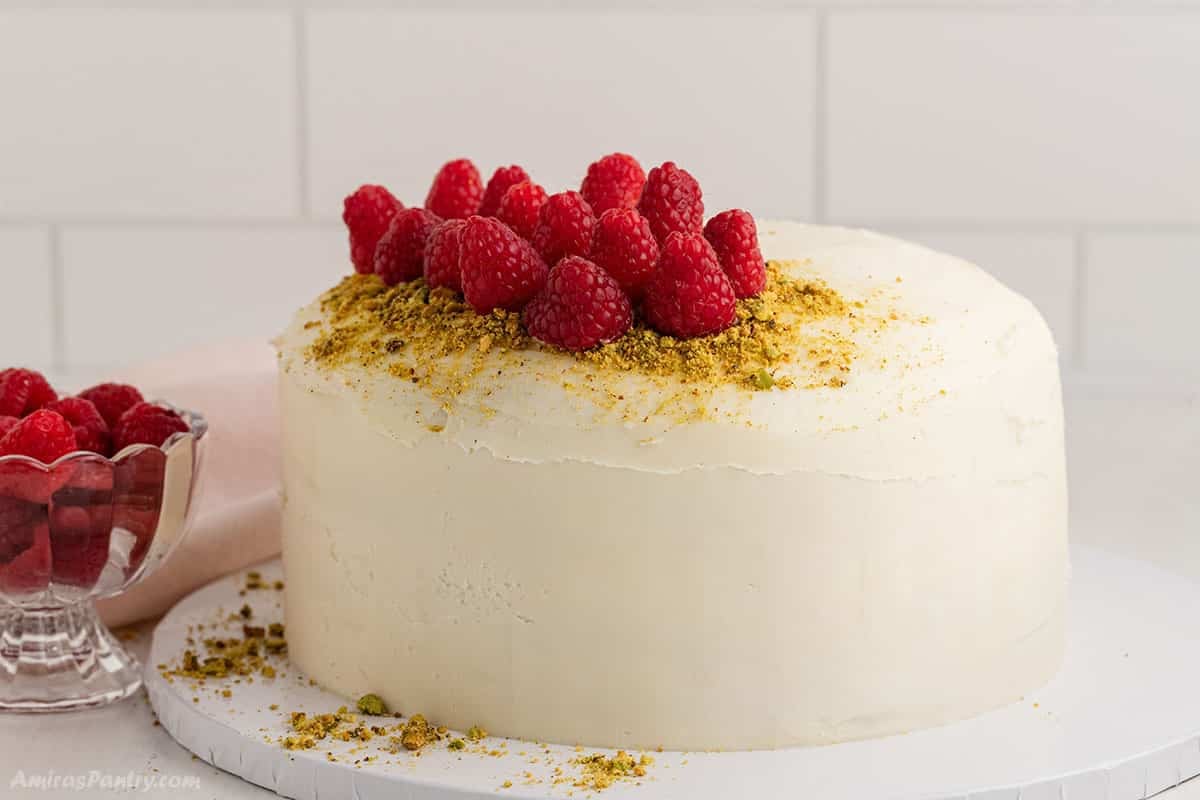
Pistachio raspberry cake is a moist cake with a rich, nutty flavor and tender crumb. Four pistachio cake layers are stacked high with a tart, jammy fresh raspberry filling and wrapped in a creamy vanilla buttercream frosting.
Jump to:
Real Pistachio Flavor
I wanted to create a cake with natural pistachio flavor, a tender crumb, raspberry filling, and homemade frosting. An important priority was making the recipe approachable for everyday home bakers without requiring several days to prepare individual components.
I decided to use my Pistachio Bundt Cake as the starting point. Through testing, the decision was made to use pistachio flour instead of paste to support the raspberry filling and allow the cake to be slice horizontally.

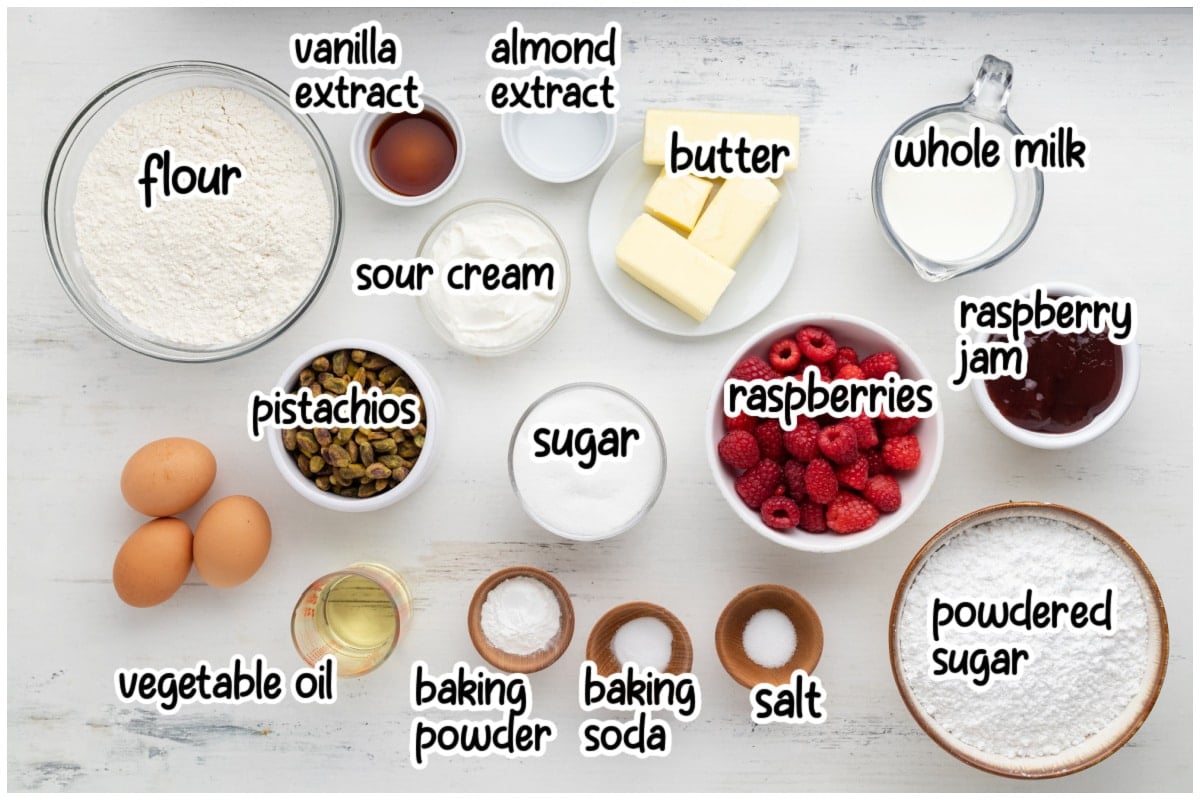
Ingredients
Substitutions & Variations
- You can swap the full fat sour cream 1:1 with plain, full fat Greek yogurt for the exact same moisture and tang.
- If you aren't a fan of almond extract, reduce it to ¼ teaspoon or omit it completely and increase the vanilla extract to 1½ teaspoons.
- Seedless raspberry jam gives the smoothest finish, but raspberry preserves, blackberry jam, or strawberry preserves work wonderfully as substitutes.
- Short on time? Skip slicing the cakes horizontally and assemble it as a classic two-layer cake with all the raspberry filling in the middle. You will have extra buttercream left over to pipe decorative swirls on top.
Pro Tip
Chilling between assembly and frosting helps stabilize the layers and prevents them from sliding. A longer final chill makes the finished cake easier to move or transport.
Pistachio Raspberry Layer Cake
Ingredients
Pistachio Cake
- 2¼ cups (270 g) all-purpose flour
- 1¼ cups (165 g ) shelled pistachios
- 1½ cups (300 g) granulated sugar
- 2 teaspoons baking powder
- ½ teaspoon baking soda
- ½ teaspoon salt
- 10 tablespoons (142 g) unsalted butter , softened (1 stick plus 2 tablespoons)
- ¼ cup (56 g ) neutral vegetable oil
- 3 large eggs room temperature
- ½ cup (120 g) full-fat sour cream
- ¾ cup (180 g) whole milk , room temperature
- 1 teaspoon vanilla extract
- ½ teaspoon almond extract
Raspberry Filling
- 12.5 oz seedless raspberry jam
- ¾ cup fresh raspberries
Vanilla Buttercream Frosting
- 2 cups (454 g) unsalted butter, softened (4 sticks)
- 6 cups (720 g ) powdered sugar, sifted
- 4 teaspoons vanilla extract
- 2 to 4 teaspoons whole milk as needed
- ¼ teaspoon salt
Garnish
- Fresh raspberries
- Chopped pistachios
Instructions
Make the Pistachio Flour
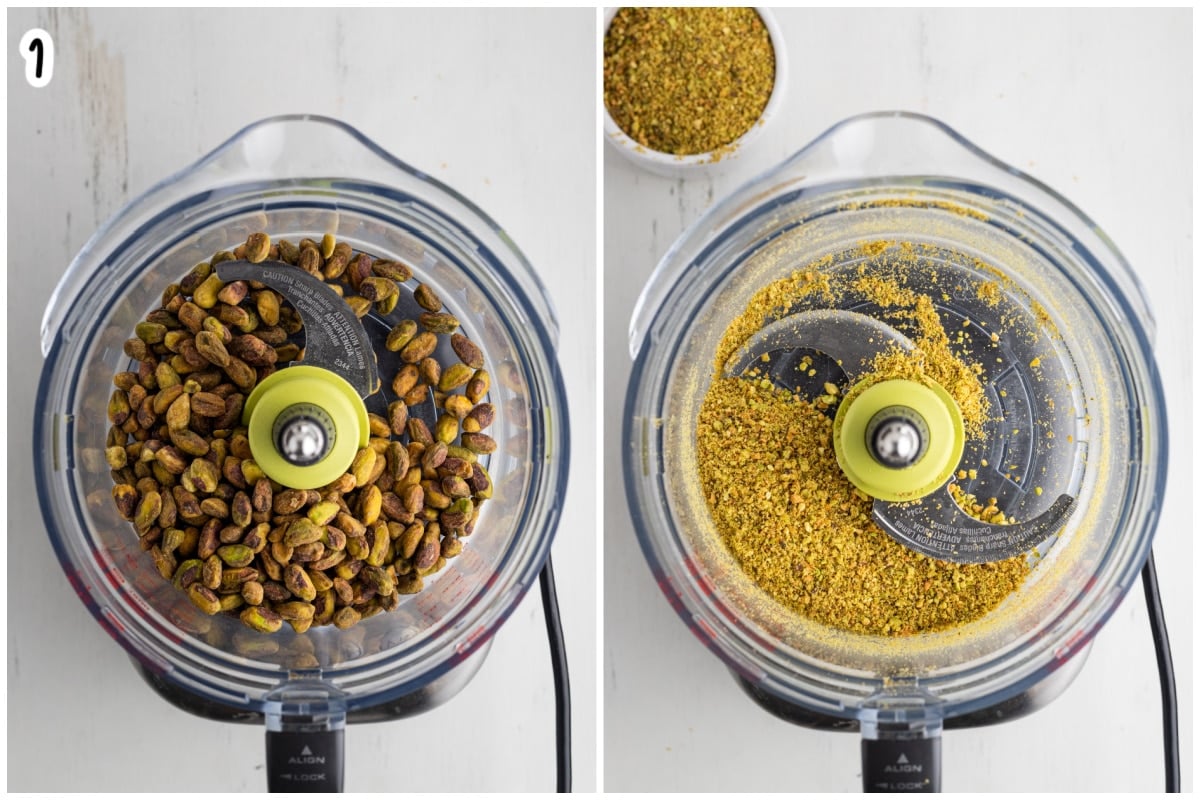
- Add the shelled pistachios to a food processor fitted with the blade attachment.
- Process for approximately 20 to 30 seconds, stopping to check the texture after about 15 seconds. The pistachios should be finely ground with a texture resembling coarse sand.
- Avoid overprocessing, as the pistachios will begin to release their natural oils and turn into pistachio paste.
- Measure 1 cup (120g) of the ground pistachios for the cake batter. Reserve any remaining ground pistachios for garnishing the finished cake.
Make the cake
- Preheat the oven to 350°F. Grease two 8-inch round cake pans and line the bottoms with parchment paper.
- In a medium bowl, whisk together the all-purpose flour, 1 cup of the pistachio flour, baking powder, baking soda, and salt. Set aside.
- In a separate bowl, whisk together the sour cream, whole milk, vanilla extract, and almond extract. Set aside.
- In a large mixing bowl with either a hand mixer or stand mixer, beat the softened butter and granulated sugar on medium speed for 3–4 minutes until well combined and lighter in texture.
- Add the vegetable oil and continue to mix until fully incorporated, scraping down the sides of the bowl as needed. With the addition of the oil, the batter will begin to become smoother.
- Add the eggs one at a time, beating each in before adding the next.
- Reduce the speed to low. Add one-third of the dry ingredients, followed by half of the sour cream mixture. Repeat, finishing with the remaining dry ingredients, mixing until just combined. Do not overmix.
- Divide the batter evenly between the prepared cake pans. The batter will be thick and scoopable. Use an offset spatula to spread it evenly and smooth the tops.
- Bake for 35 to 40 minutes, or until a toothpick inserted in the middle comes out clean or with a few moist crumbs. The tops should also spring back when gently pressed with a fingertip.
- Allow the cakes to cool in their pans for 10 to 15 minutes. Carefully remove them from the pans and transfer to a wire rack to cool completely before slicing and assembling.
Prepare the raspberry filling
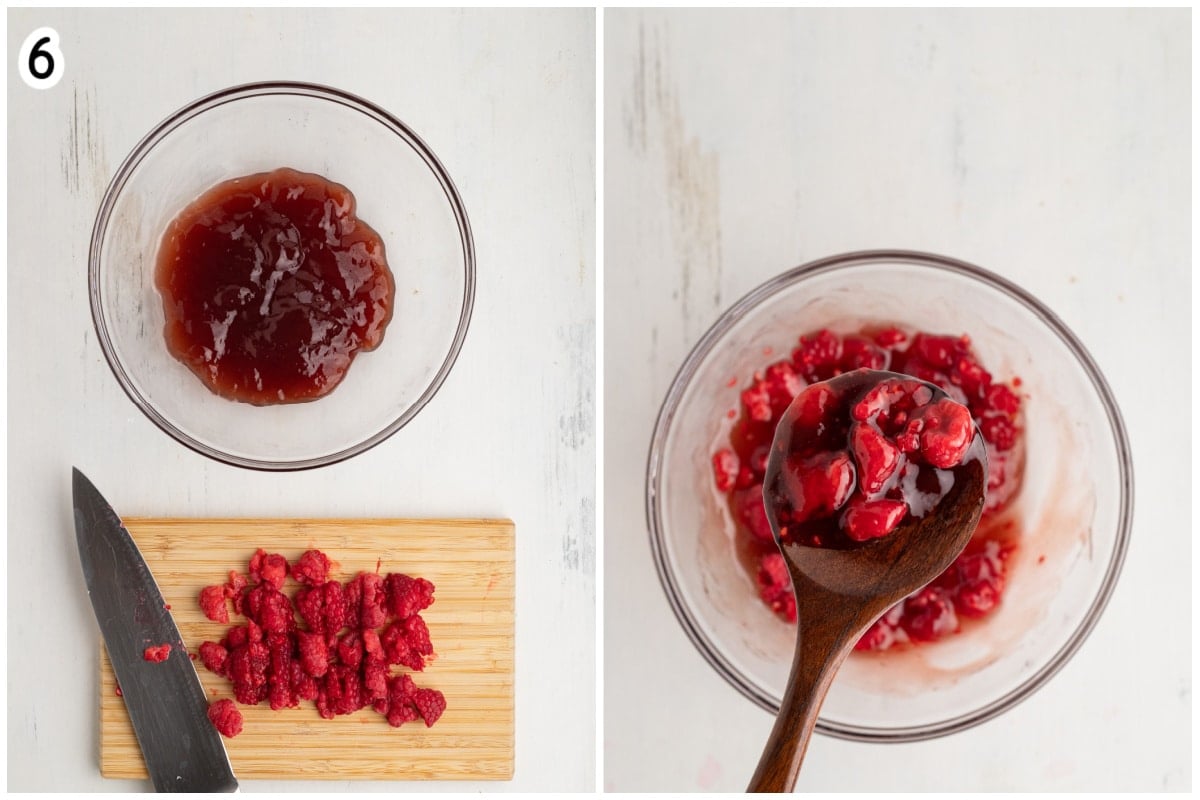
- Place the seedless raspberry jam in a small bowl and stir until smooth and spreadable.
- Rough chop the fresh raspberries into smaller pieces.
- Just before assembling the cake, gently mix the berries into the jam.
Prepare the vanilla buttercream
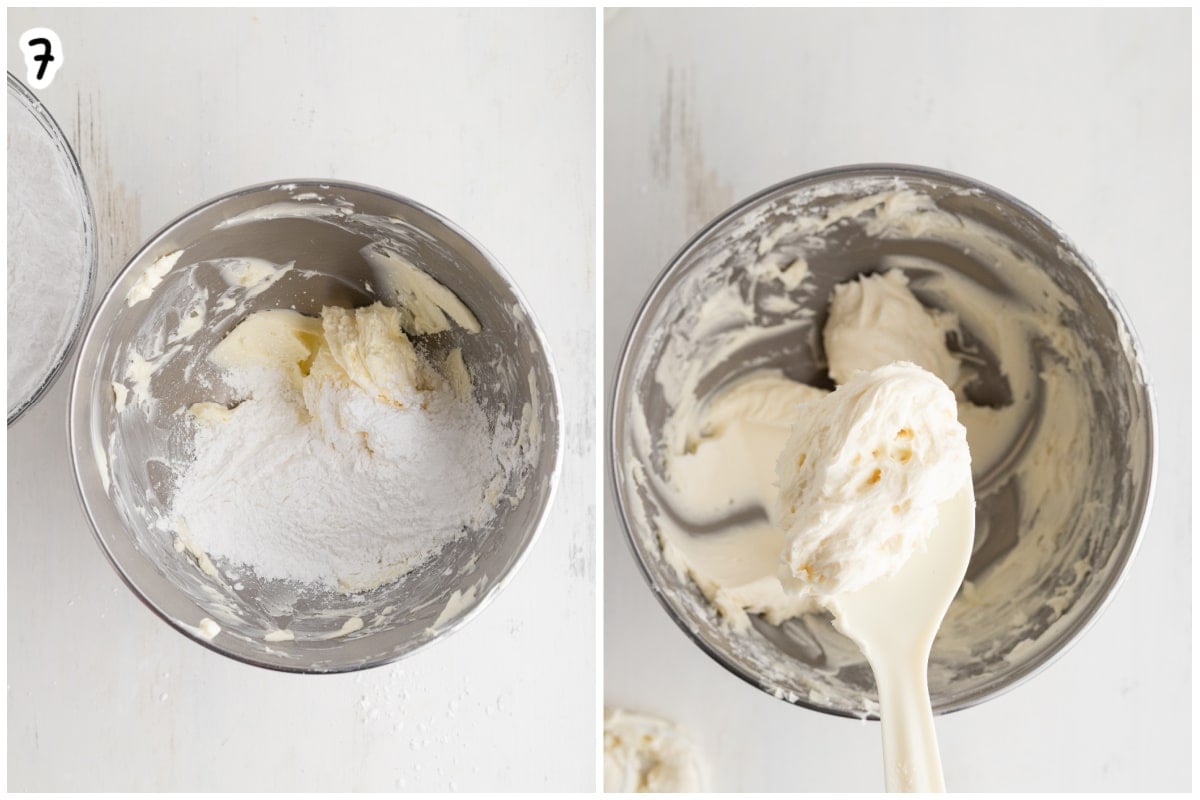
- In a large mixing bowl fitted with the paddle attachment, beat the softened butter on medium speed for 3 to 4 minutes until smooth and creamy. Do not skip this step as properly creaming the butter helps create a smoother frosting.
- Gradually add the sifted powdered sugar, mixing on low speed until fully incorporated. Scrape down the sides as needed.
- Add the vanilla extract, salt, and 2 teaspoons of whole milk. Mix until incorporated. If needed, add additional milk, ½ teaspoon at a time, up to 4 teaspoons total, until the buttercream is smooth, creamy, and spreadable but still firm enough to hold its shape.
- Continue beating on medium until creamy and smooth for about 2 to 3 minutes.
- The finished buttercream should be smooth and spreadable but sturdy enough to hold its shape. It should not drip or run off a spoon.
- Check doneness: To test the texture, spread a small amount of buttercream against the inside of the mixing bowl using an offset spatula. The frosting should spread smoothly without pulling or tearing. Even if the buttercream looks ready, continue mixing on low speed for another 1 minute, then check the texture again. If needed, mix for an additional minute until smooth and creamy.
Assemble the Cake
- Once the cakes have cooled completely, level the tops if necessary. Using a serrated knife, carefully slice each cake horizontally into two even layers, creating four cake layers.
- Put a small dollop of vanilla buttercream in the center of a cake board or serving plate. Place the first bottom cake layer over the buttercream and press gently to secure it.
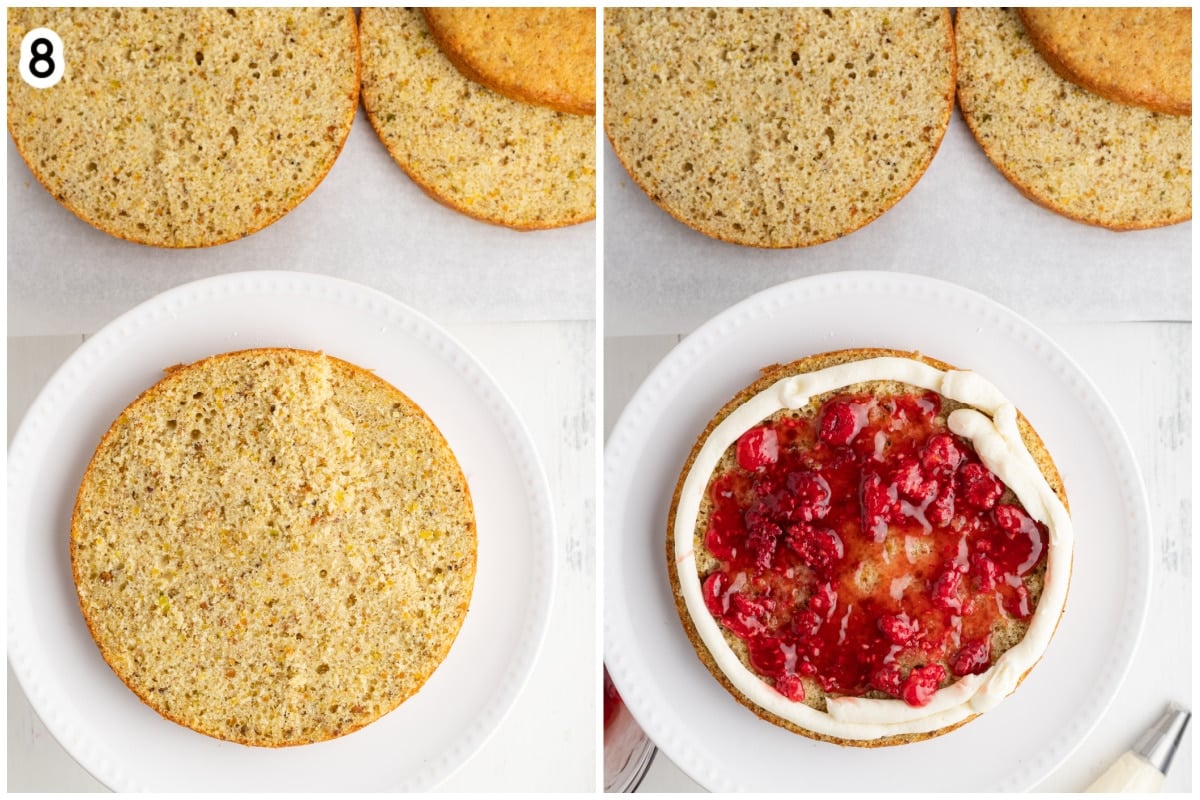
- Transfer some buttercream to a piping bag fitted with a round or star tip. Pipe a continuous, sturdy border of buttercream around the outer edge of the cake. This creates a barrier to keep the raspberry filling from escaping out the sides.
- Spoon approximately one-third of the raspberry filling and raspberries inside the buttercream border. Spread gently into an even layer without disturbing the border.
- Place the second cake layer on top and repeat the piped buttercream border and raspberry filling. Continue until all three filling layers are complete.
- Place the final cake layer on top, cut side down, to create a smooth surface for frosting. Gently check that the cake is level and the layers are aligned.
- Refrigerate the assembled cake for 20 to 30 minutes to help the layers settle and firm up before applying the crumb coat.
Crumb coat
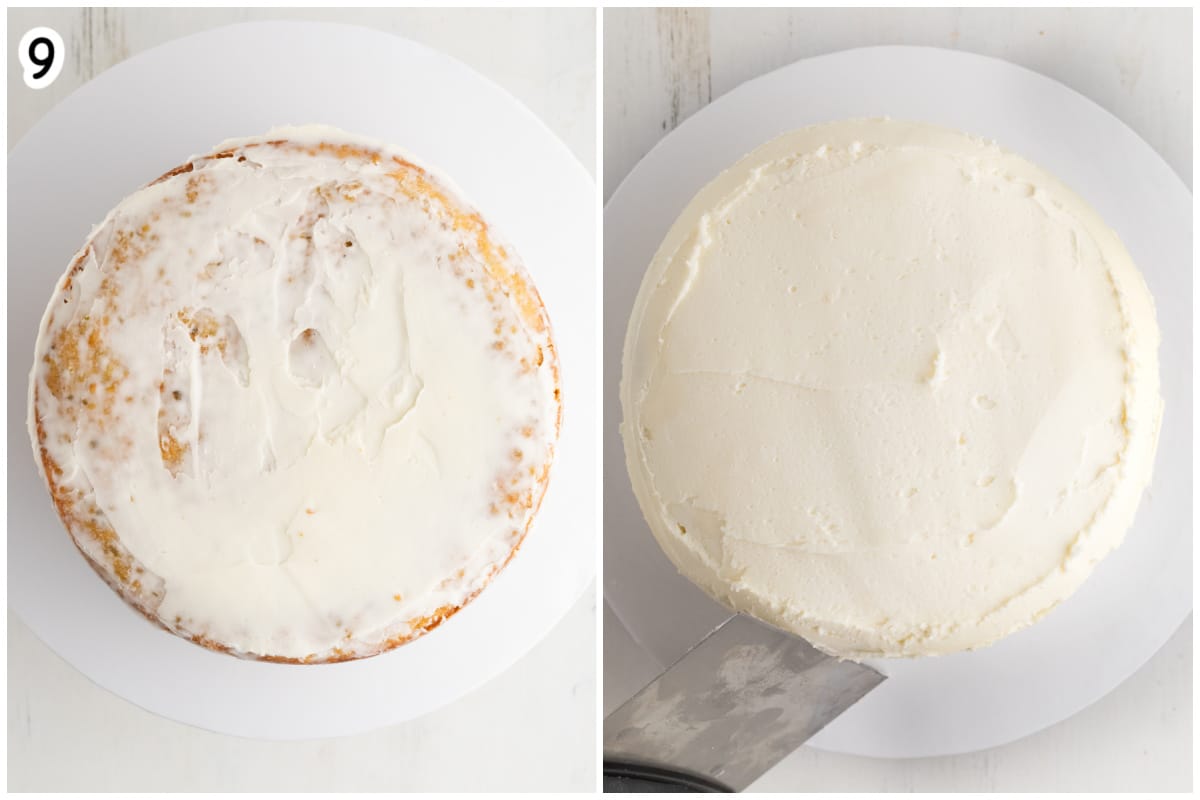
- Spread a thin layer of vanilla buttercream over the top and sides of the cake. This crumb coat traps loose cake crumbs and prevents them from mixing into the final frosting layer. It does not need to look perfect.
- Refrigerate for approximately 30 minutes, or until the crumb coat feels firm to the touch.
Frost and decorate the cake
- Place a generous amount of the remaining buttercream on top of the chilled cake. Using an offset spatula, spread the frosting across the top, gently pushing some toward the outer edges and down the sides.
- Working around the cake, spread the frosting down the sides, adding more buttercream as needed to create the opaque coat.
- Use an offset spatula or cake scraper to smooth the sides, rotating the cake as you work.
- Smooth the top last, gently pulling any excess frosting from the outer edge toward the center.
- Decorate the top of the cake with chopped pistachios and fresh raspberries.
- Refrigerate the finished cake until the frosting is firm before transferring or transporting it.
Notes
- Grinding the Pistachios: Process the pistachios only until finely ground. Really no more than thirty seconds. Check the texture frequently to prevent the natural oils from releasing and creating pistachio paste. Weigh out 120 g of the finished pistachio flour for the cake batter.
- Creaming the Butter: Beating the butter thoroughly before adding the powdered sugar is essential for creating a smooth buttercream. Allow the butter to mix for at least 3 minutes, scraping down the bowl as necessary.
- Sifting the Powdered Sugar: Always sift the powdered sugar before adding it to the butter. This helps prevent lumps and produces a smoother frosting.
- Buttercream Consistency: The buttercream should be thick enough to support the cake layers and hold the raspberry filling in place. Add milk gradually to avoid making the frosting too soft. When I first made the buttercream it only needed 2 teaspoons of milk and then another time it needed 3 teaspoons. If unsure, mix for another minute before adding in an additional teaspoon of milk.
- Making the Cake Ahead: Once the baked cakes have cooled completely, wrap each cake tightly in plastic wrap and refrigerate overnight. Chilled cake layers are easier to slice horizontally and handle during assembly.
- Creating Even Layers: Keep the two halves of each cake together when slicing. If one baked cake is slightly larger than the other, use its two halves for the bottom layers. Position the second and fourth layers with their cut sides facing down.
- Preventing Filling Leaks: Make sure the buttercream border is continuous, with no gaps. Avoid spreading the raspberry filling beyond the border.
- Chilling the Cake: Chilling between assembly and frosting helps stabilize the layers and prevents them from sliding. A longer final chill makes the finished cake easier to move or transport.
- Decorating the Cake: A perfectly smooth finish is not necessary. A slightly rustic buttercream finish is equally beautiful and complements the natural appearance of the pistachios and raspberries.
- Garnishing: If needed, use tiny dabs of buttercream underneath the raspberries to help secure them in place. Conceal the buttercream with additional chopped pistachios.
Nutrition
How to Make Pistachio Raspberry Cake
1- Place the pistachios in a food processor and pulse for 20 to 30 seconds until they resemble coarse sand. Stop and check around the 15-second mark so you don't overprocess them into pistachio butter. Measure out 1 cup for the cake batter and set the remaining ground nuts aside for decorating.
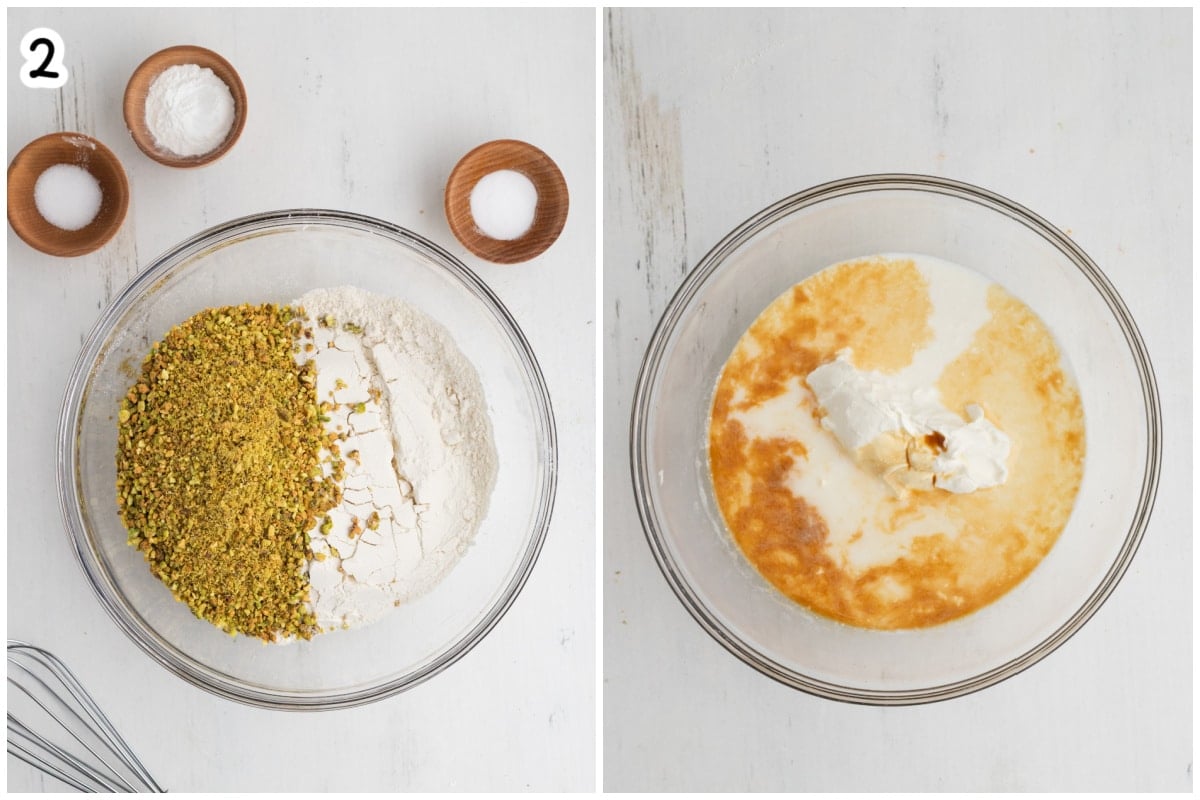
2- Whisk the flour, 1 cup of pistachio flour, baking powder, baking soda, and salt together in one bowl, and whisk the sour cream, whole milk, vanilla, and almond extract together in another.
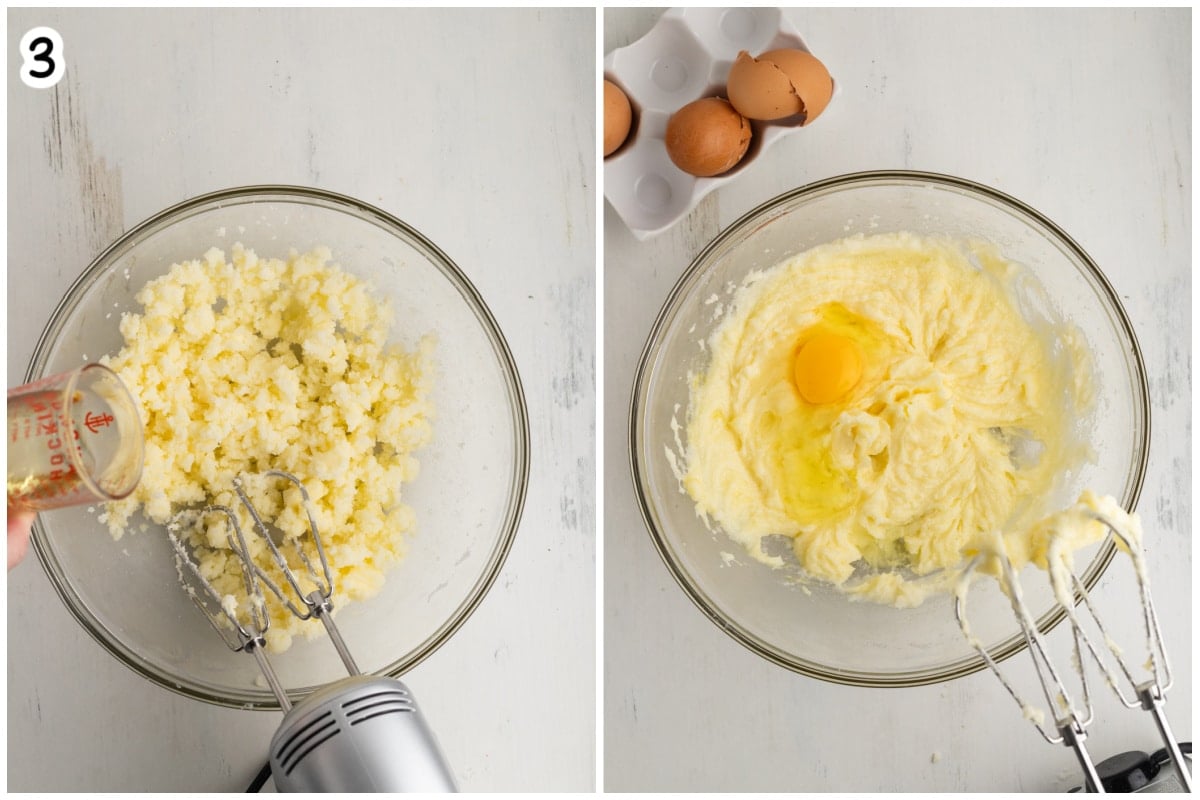
3- Beat the softened butter and granulated sugar together until pale and fluffy. Stream in the vegetable oil until the mixture turns smooth, then beat in the eggs one at a time until fully incorporated.
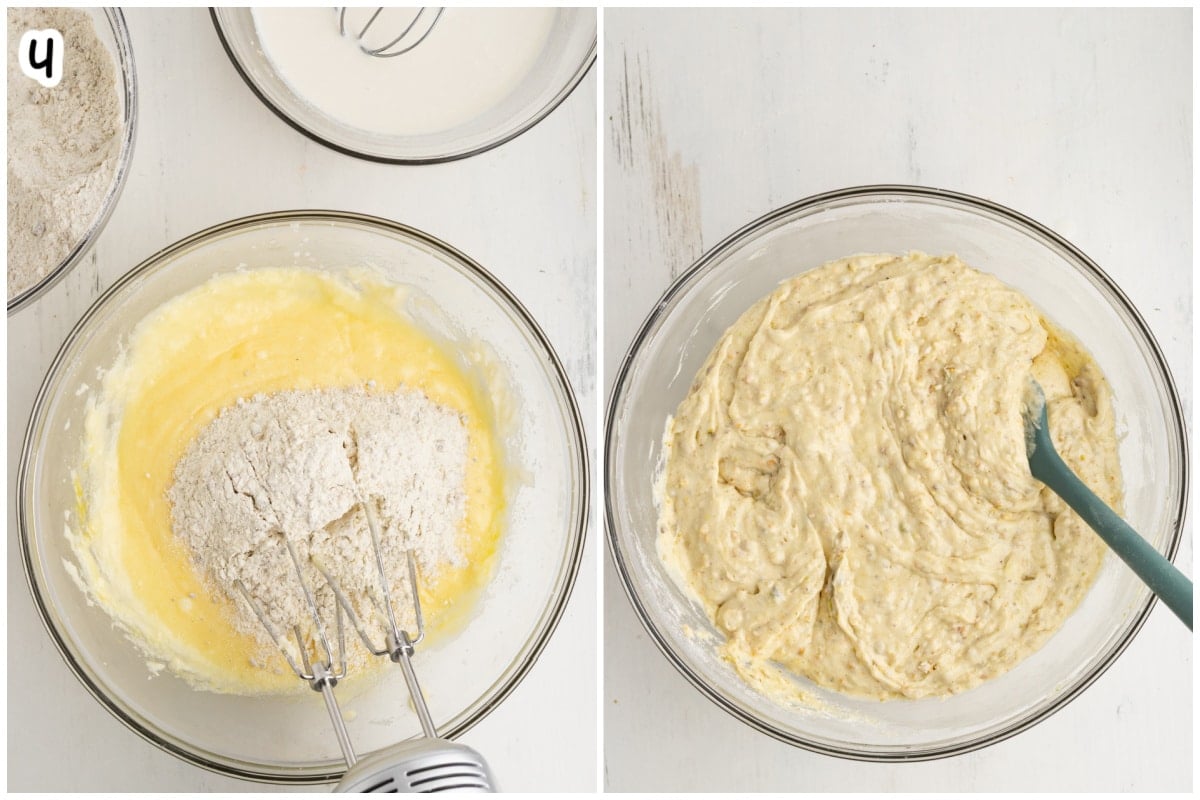
4- Turn the mixer to low and alternate adding the dry ingredients in three additions and the sour cream mixture in two additions, starting and ending with the dry ingredients. Mix just until the last streaks of flour disappear so the cake stays tender.
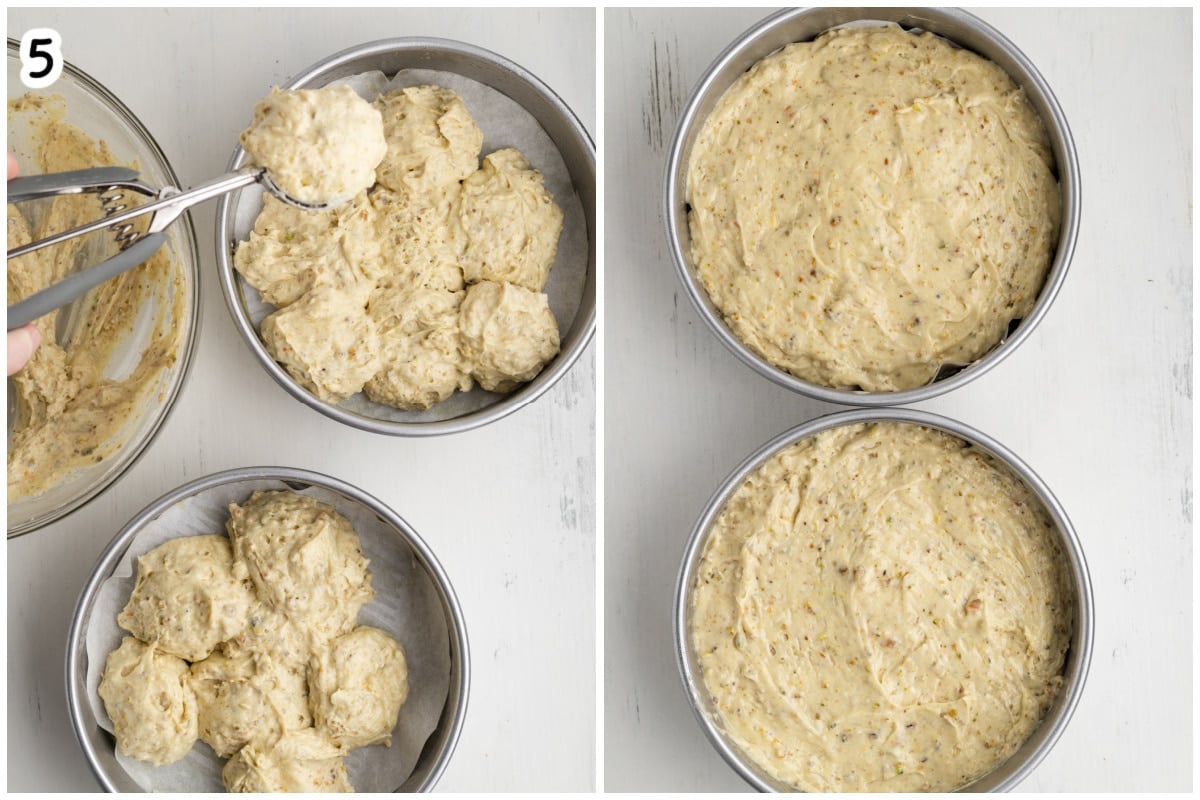
5- Divide the thick batter evenly between your two pans and smooth the tops. Bake until a toothpick comes out clean or with a few moist crumbs, then cool in the pans for 10 to 15 minutes before turning out onto a wire rack to cool completely.
6- Stir the seedless raspberry jam in a small bowl until smooth and loose, and roughly chop the fresh raspberries. Wait until right before assembling the cake to fold the fresh berries into the jam so they don't release excess juice too early.
7- Beat the softened butter for 3 to 4 minutes until creamy before gradually mixing in the sifted powdered sugar on low speed. Add the vanilla, salt, and 2 teaspoons of milk, then beat on medium for 2 to 3 minutes until fluffy, spreadable, and sturdy.
8- Slice each cooled cake horizontally in half with a serrated knife to create four even layers. Secure the bottom layer to your serving plate with a dab of frosting, pipe a thick buttercream dam around the outer edge, spread a third of the raspberry filling inside, and repeat until all four layers are stacked, refrigerate for 20- to 30 minutes.
9- Spread a thin crumb coat of buttercream all over the chilled cake and refrigerate for 30 minutes until firm to the touch. Apply a generous final coat of frosting, smooth the top and sides, and finish with fresh raspberries and the reserved chopped pistachios.
FAQs or Troubleshooting Guide
Running the food processor continuously generates friction and heat that releases oils from pistachios. Next time, use short 1 second pulses and stop as soon as the nuts look like coarse sand.
This happens either because the buttercream border had a gap, the buttercream was too soft, or the filling was spread higher than the frosting dam. Make sure your piped border is thick and completely closed, keep the filling slightly below the height of the buttercream ring, and chill the stacked cake for 30 minutes before crumb-coating.
If it looks slightly separated, the butter or milk may have been a little too cold; keep beating on medium speed for another 1 to 2 minutes until it warms slightly and comes together. If you see tiny air pockets, switch to a wooden spoon or silicone spatula and stir the frosting firmly by hand against the sides of the bowl for a minute to press out the air.
Dryness usually comes from accidentally scooping too much flour or overbaking. Spoon and level your flour (or better yet weigh it) rather than scooping directly with the measuring cup, and start checking the cakes with a toothpick at the 35 minute mark.
Recipe Tips
- Weigh Your Ingredients using a kitchen scale (especially for the 120 g of ground pistachios and 270 g of flour) prevents a dry, dense crumb.
- When making the frosting, don’t skip whipping the butter first. Beating the butter by itself for a full 3 to 4 minutes before adding powdered sugar incorporates air and guarantees a silky, non gritty buttercream.
- Always sift the powdered sugar. Sifting eliminates stubborn sugar lumps that can clog a piping tip or leave streaks in your final coat.
- Chilling the stacked cake before crumb coating, and chilling the crumb coat before final frosting, keeps the tall layers from sliding around.
More Cake Recipes
- Snowball Cake.
- Chocolate Biscuit Cake.
- Carrot Bundt Cake.
- Chocolate Pumpkin Cake.
- Red Velvert Bundt Cake.
- Roasted Powdered Milk Cake.
- Pumpkin Bundt Cake with Buttercream Frosting.




Leave a Reply