Are you ready to bake your first pie from scratch but the directions call for blind baking the crust? Don't be intimated, with these simple steps, you will find out how to blind-bake pie crust to help you make the perfect pie.

Jump to:
Why You'll Love It
- Blind baking a pie crust is necessary for certain recipes that require an empty pre-baked bottom or or if you are making custard pies or cream pies.
- It will help keep your crust crisp and prevent it from from having a soggy bottom when adding the filling.
- Plus, it’s not as hard as it seems!
Blind baking a pie crust is essentially pre-baking the crust before adding the filling. This ensures that your bottom crust will be golden and crispy and won’t end up soggy once the filling is added. It's so simple.

How to Blind Bake Pie Crust
Ingredients
- 1 ¼ cup all purpose flour
- ½ teaspoon granulated sugar
- ¼ teaspoon salt
- 5 Tablespoons butter Chilled and cubed.
- 3 Tablespoons vegetable shortening Chilled and cubed.
- 4-6 Tablespoons iced water
Instructions
Make the dough:
- In the bowl of your food processor, combine flour, sugar, salt and pulse for 2 seconds to combine.
- Add cold butter and shortening cubes and pulse until the dough just begins to form clumps about 6-8 times, . Do not over mix you want to see the pieces of butter on the crust.
- Place water in a cup with a couple cubes of ice.
- Transfer mixture to a bowl, add cold water, 1 Tablespoon at a time, and mix with a rubber spatula until it comes together into a ball.
- Form the dough into a 4 inch disc then wrap tightly with plastic wrap.
- Refrigerate for a couple of hours or overnight.
Rolling the dough:
- Lightly dust a clean working surface with flour. Take your dough out and place it on your surface.
- Sprinkle little flour on top of the dough. Flour your hands and the rolling pin as well.
- Use gentle force to roll the disc starting from center and working your way outwards. Give the dough quarter turn every few strokes.
- Keep rolling until you reach a 12 inch circle.
- Roll the dough loosely around your rolling pin then gently unroll the dough over your pie plate.
- Fit the dough snugly into your plate by pressing gently all along the sides. The finished dough will overhang your pie plate by an inch or two. Fold extra dough under the edges so we have a thicker edge.
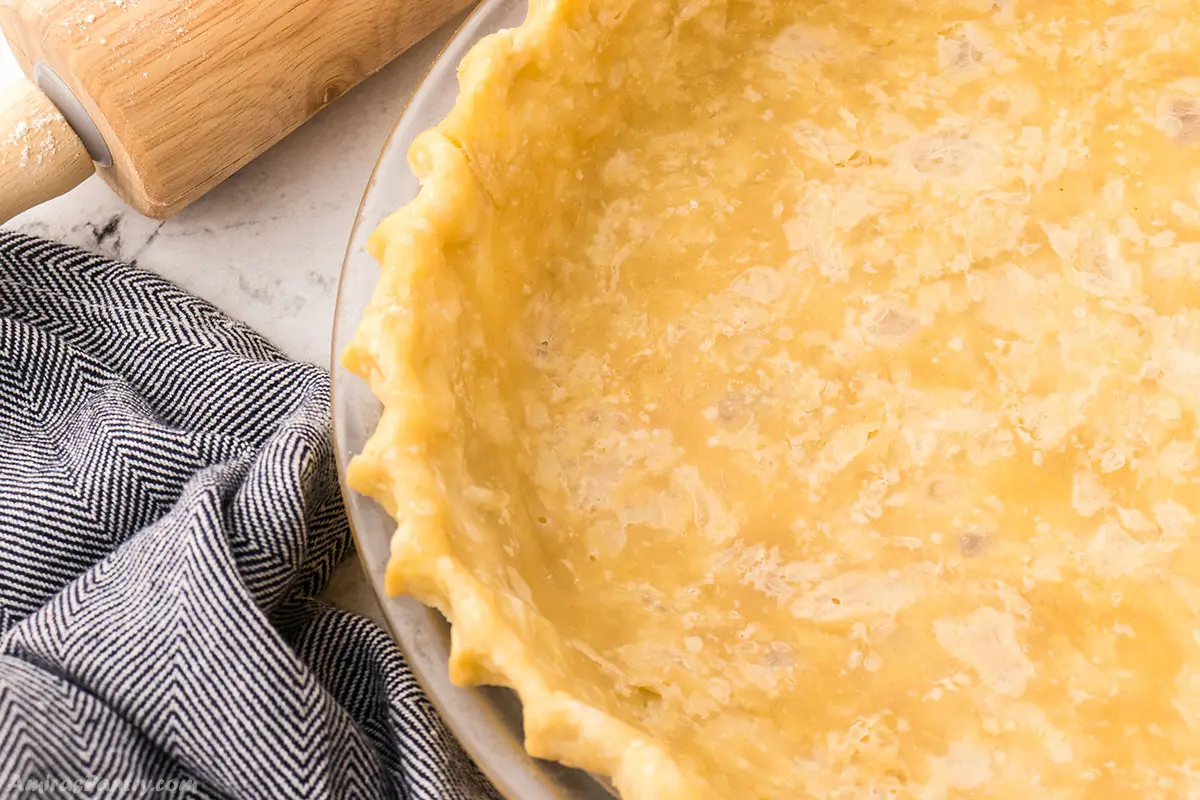
- Make a decorative edge for the pie by crimping it into a v shape using your fingers
- Place finished pie in the freezer for 30 minutes.
Par-bake or Pre-bake your pie:
- Preheat oven to 350F.
- Line the cold dough with heavy duty aluminum foil, gently pressing it down into the pie plate and gently covering the edges.
- Fill the pie with granulated sugar to the top edge of the pie dish.
- Bake, in center rack, for 50 minutes and then check the edges of the pie by gently lifting the edge of the aluminum foil.
- Add an additional 5 minutes if needed.
- Remove from oven and carefully remove the aluminum foil and sugar.
- The dough will continue to bake on the bottom after removing the foil.
If your recipe calls for a partially baked pie (par-baked pie)
- You will want to check the crust at 25-30 minutes.
Video
Notes
- When you are mixing the dough you will want to add enough water to hold the dough together but not too much that thedough is wet. Do not overmix the dough.
• If the dough is crumbling at the edges when you are rolling you may be using too much force or the dough may not be wet enough. If this is the case, dip your fingers in the iced water and pull the edges back together. Sprinkle with a little flour to ensure that the rolling pin does not stick to the dough and gently roll out.
• The use of the sugar to weigh down the pie keeps the dough from shrinking and puffing. If you would rather use pie weights or beans be sure to fill the pie to the top edge. My preference after experimenting with all of these methods is
the use of sugar. Because the granules are so small they fill the pie evenly making for a nicely formed crust.
• With this method of using sugar as your weight you do not need to dock the pie crust or remove the foil halfway through baking.
• Do not skip placing the dough in the freezer and do not freeze for longer than the required 30 minutes as this will adjust your cooking time.
• You can re-use the sugar by placing in a storage bag and labeling for use as pie weight. I would not recommend using the sugar in any recipes. - Please check the nutrition disclaimer policy.
Nutrition
Ingredients
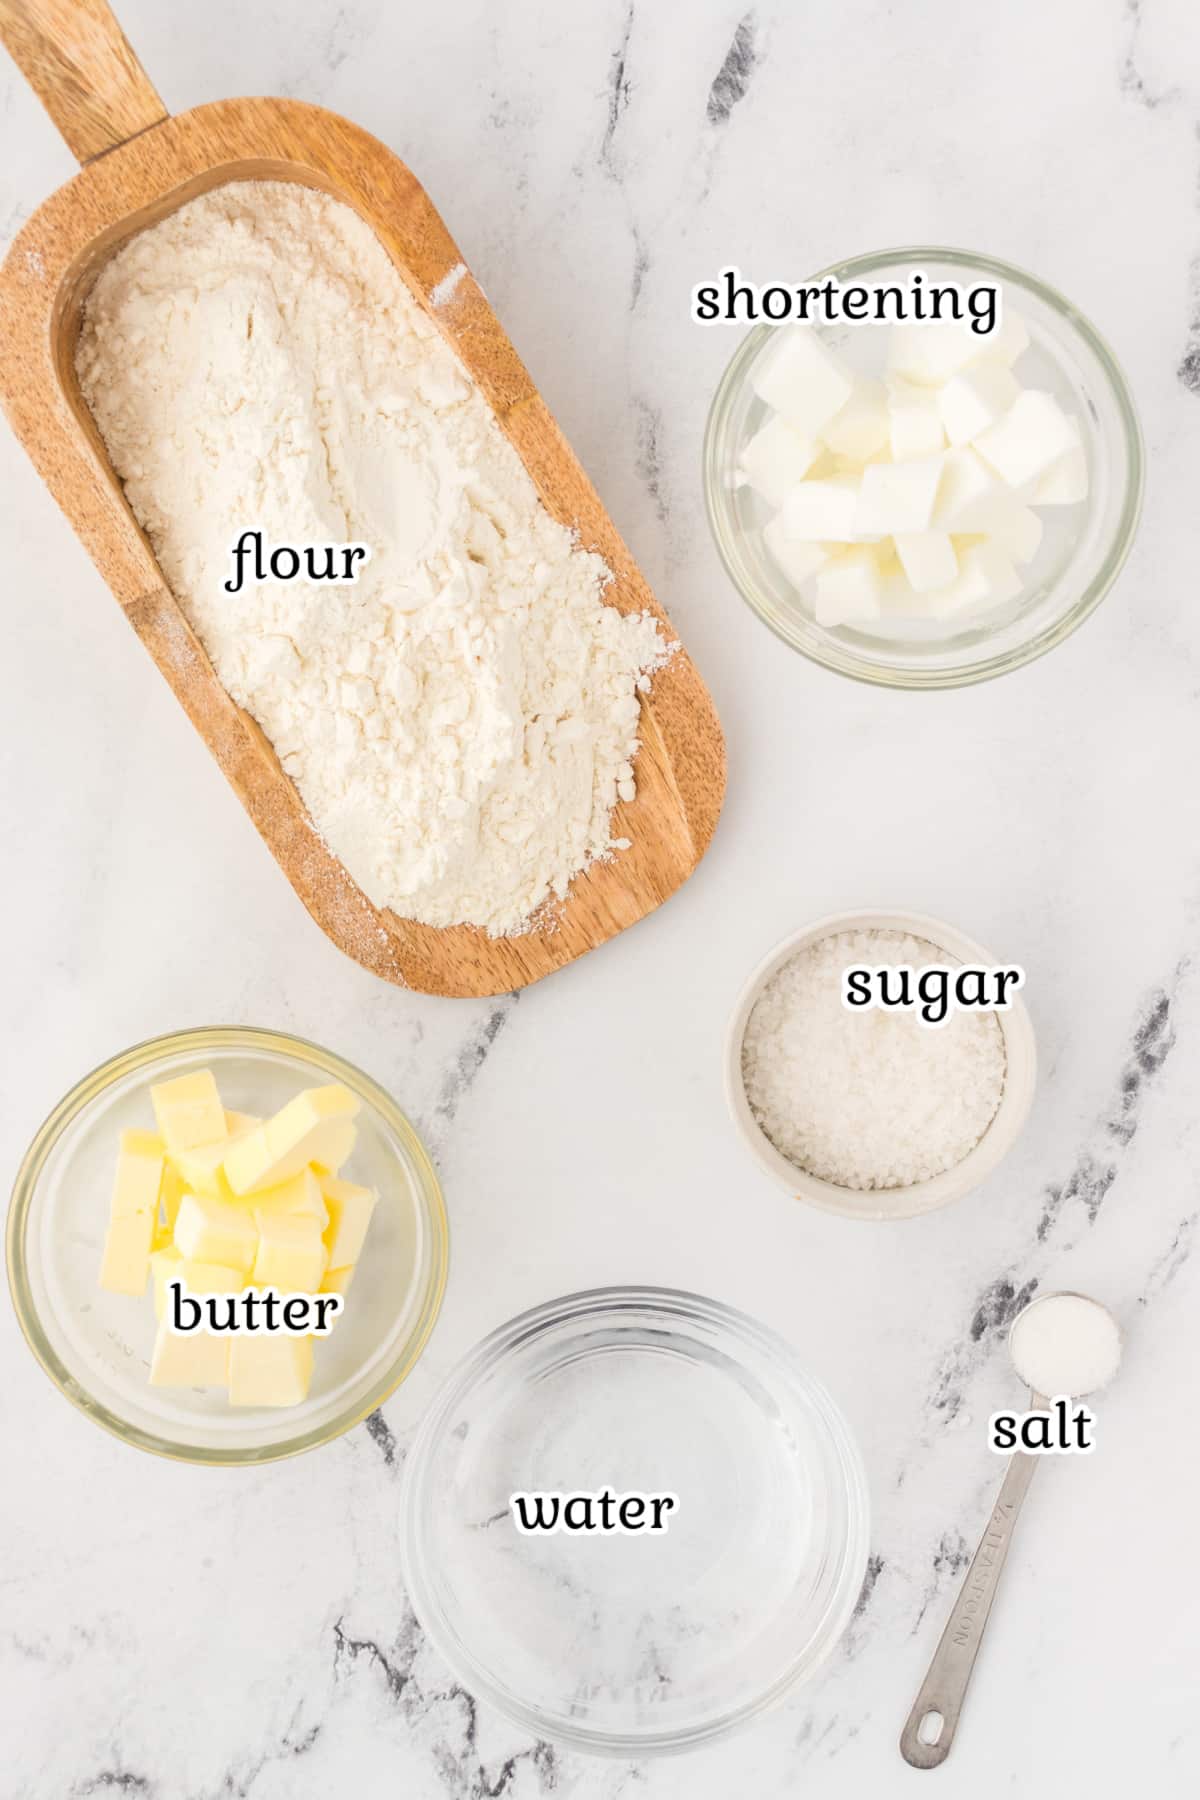
Ingredient Notes
- You will need all purpose flour to make the perfect homemade pie crust.
- Granulated sugar adds a touch of sweetness to the pie base.
- Salt helps to increase the flavor in this crust.
- I recommend using unsalted and cold butter.
- Vegetable shortening will all need to be chilled for best results.
- Ice water will help you get a firm crust on your pie.
Instructions
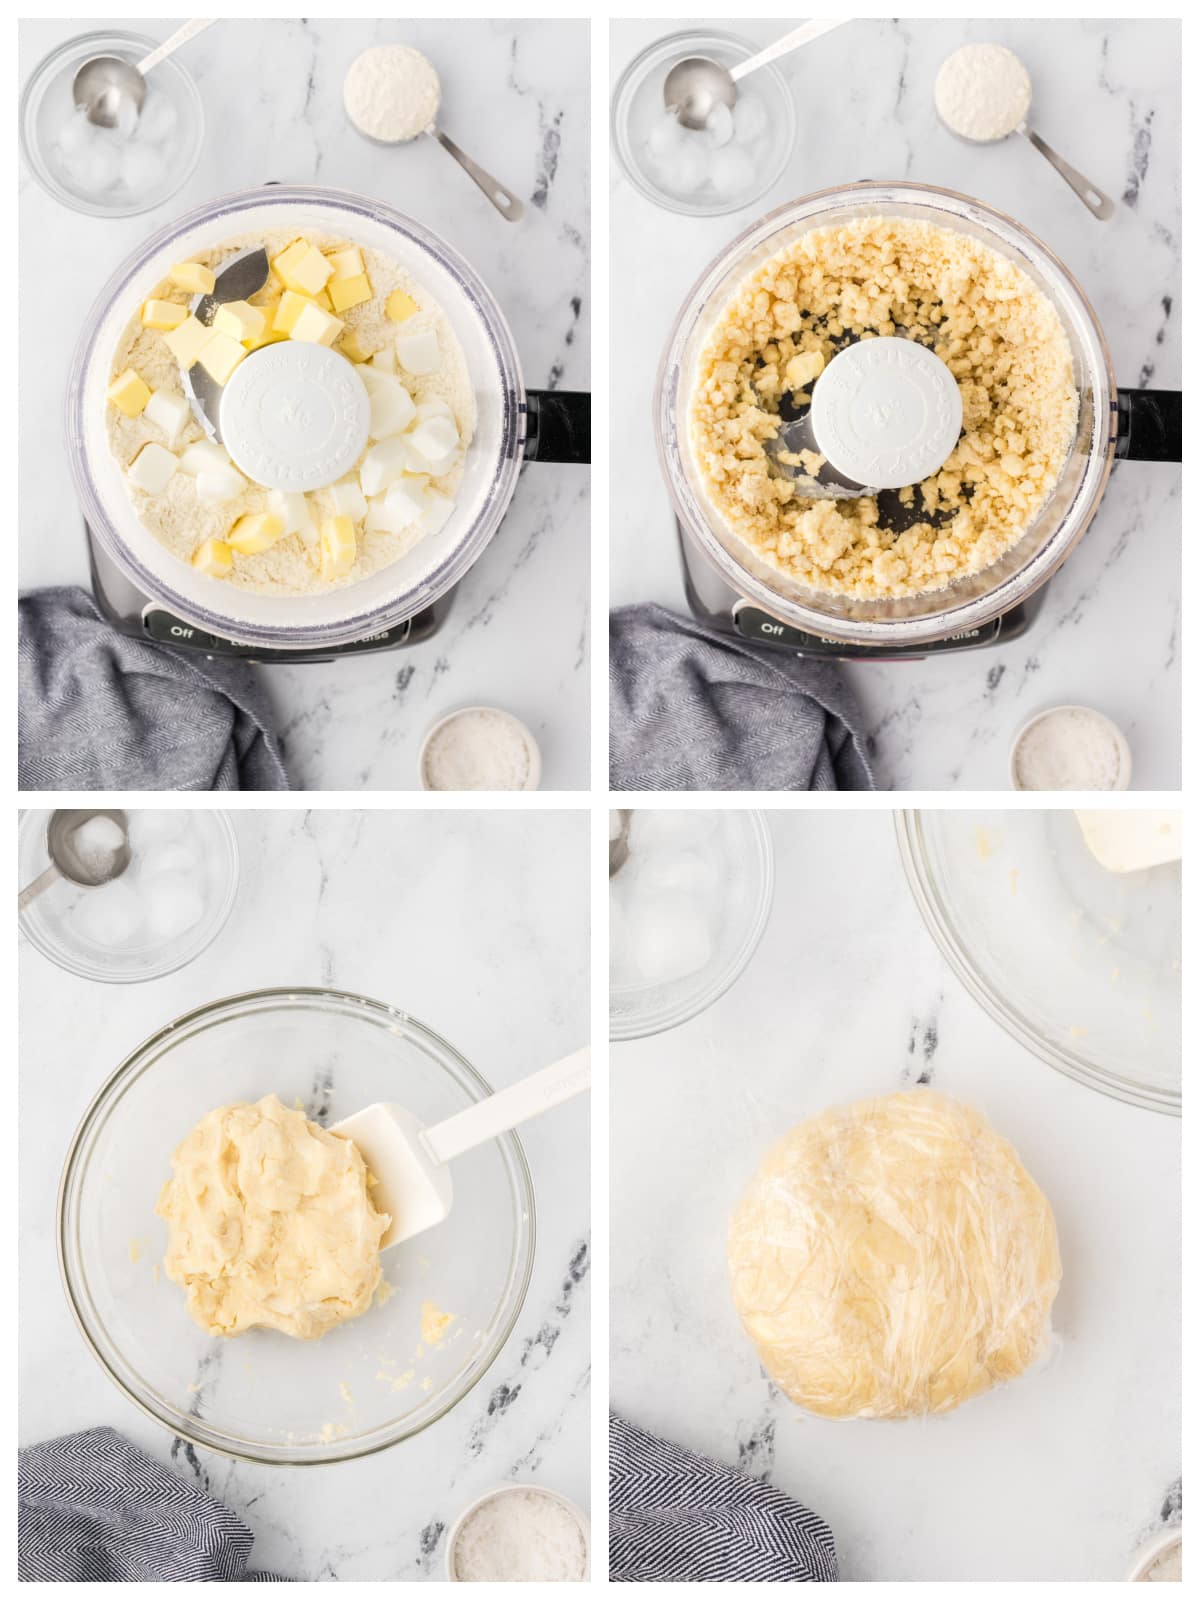
- In the bowl of your food processor, combine flour, sugar, salt and pulse for 2 seconds to combine. Add cold butter and shortening cubes.
- Pulse until the dough just begins to form clumps about 6-8 times, . Do not over mix.
- Transfer mixture to a bowl, add cold water, 1 Tablespoon at a time, and mix with a rubber spatula until it comes together into a ball.
- Wrap tightly with plastic and refrigerate for a couple of hours.wrap
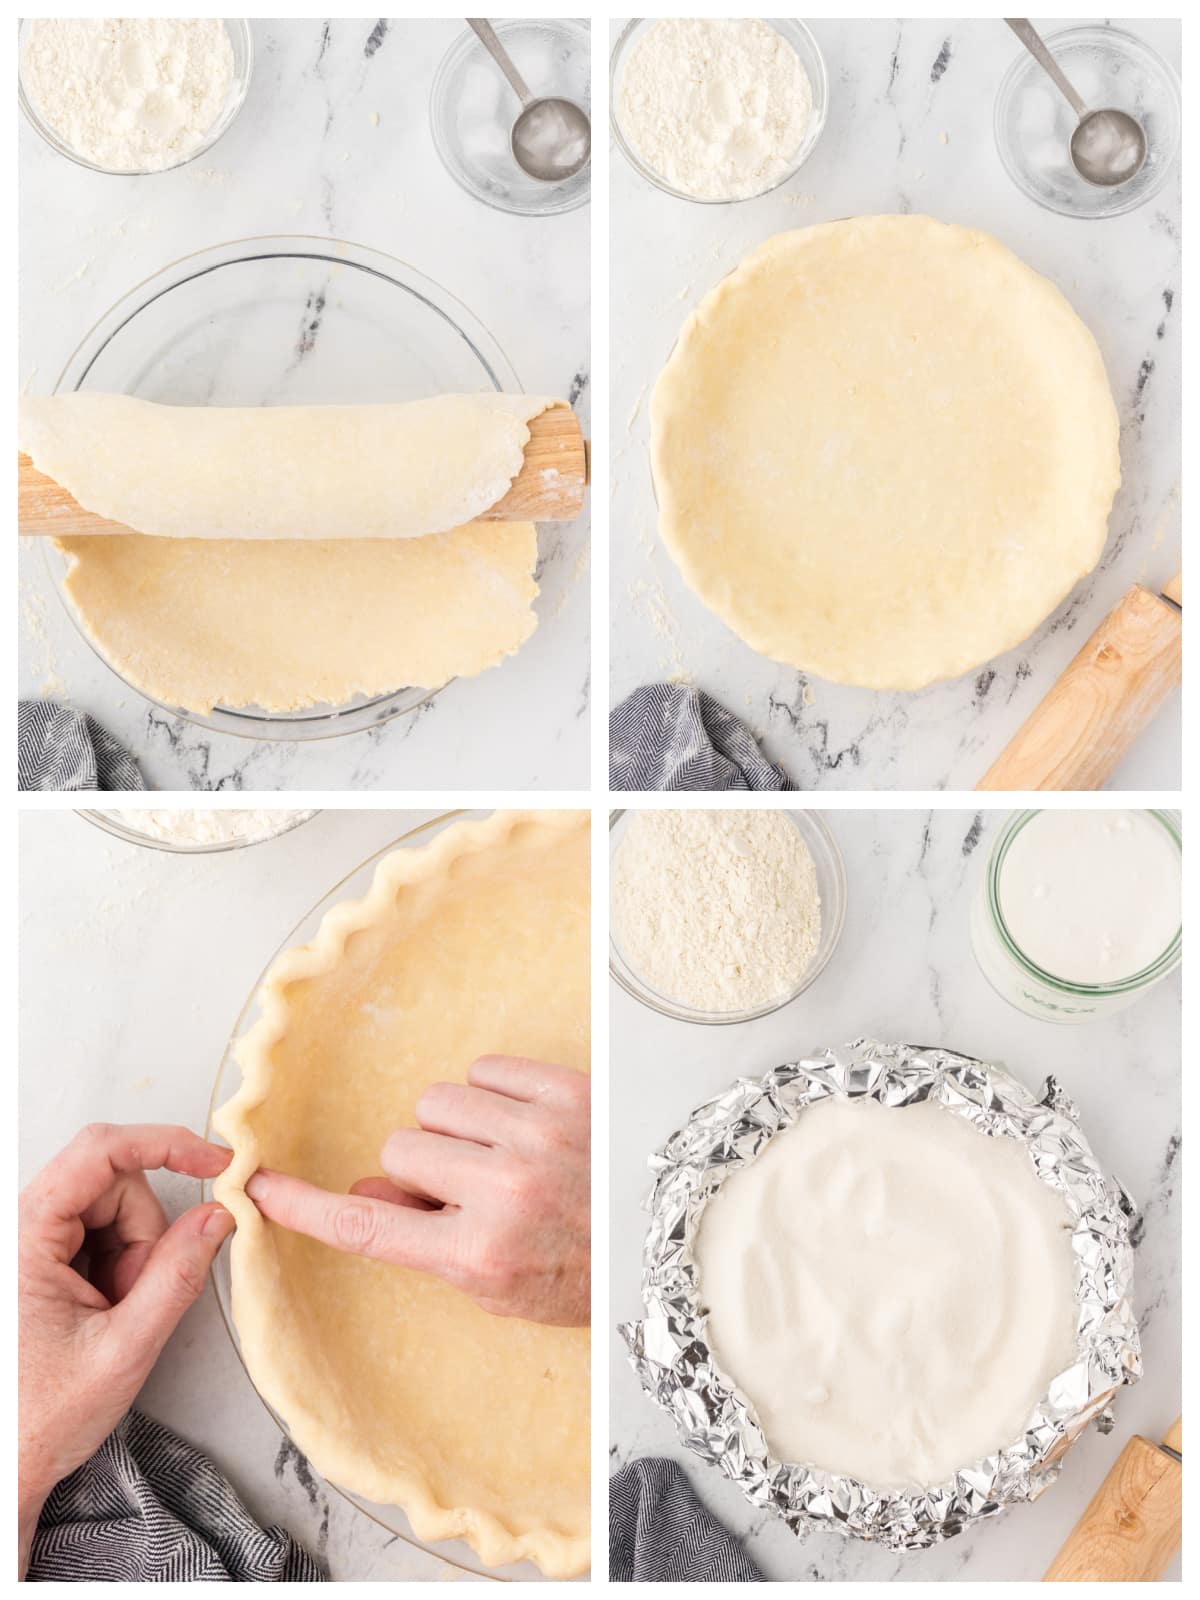
- Lightly dust a clean working surface with flour , dust the dough and the rolling pin as well then roll the dough into a 12 inch circle. Roll the dough loosely around your rolling pin then gently unroll the dough over your pie pan.
- Fit the dough snugly into your plate and fold extra dough under the edges.
- Make a decorative edge for the pie by crimping it into a v shape using your fingers. Freeze for 30 minutes.
- Line the cold dough with heavy duty aluminum foil and fill with granulated sugar to the top edge of the pie dish. Bake as directed in the recipe card below.
Amira's Tips
- I recommend cutting the butter and shortening it into pieces before you add it to the food processor this will help the crust come together nicely.
- Use the food processor for cutting the fat into your flour but then turn it out into a bowl and finish adding the water by hand to prevent overworking your dough.
- When you are mixing the dough you will want to add enough water to hold the dough together but not too much that the dough is wet. Do not over mix the dough.
- If the dough is crumbling at the edges when you are rolling you may be using too much force or the dough may not be wet enough. If this is the case, dip your fingers in the iced water and pull the edges back together. Sprinkle with a little flour to ensure that the rolling pin does not stick to the dough and gently roll out.
- Chill the dough before you roll it out, and then chill it again before you bake it. That will give you the best results in your pie crust.The use of the sugar to weigh down the pie keeps the dough from shrinking and puffing. If you would rather use pie weights or dry beans be sure to fill the pie to the top edge and use a piece of parchment paper. My preference after experimenting with all of these methods is the use of sugar. Because the granules are so small they fill the pie evenly making for a nicely formed crust.
- With this method of using sugar as your weight you do not need to dock the pie crust or remove the foil halfway through baking.
- Once the crust is done baking, remove the foil and allow it to cool before adding your filling.
- You can re-use the sugar by placing in a storage bag and labeling for use as pie weight. I would not recommend using the sugar in any recipes.
Storage
- Store the pie crust dough in an airtight container or wrap it in plastic wrap and place it in the refrigerator for up to 2-3 days.
Make Ahead
- You can also make your pie crust ahead and freeze it for up to 3 months. To freeze the crust, wrap it in plastic wrap and then place it in a resealable bag and store it in your freezer until you need to use it.
- Once you are ready to use the frozen dough, set it out at room temperature for 30 minutes before rolling it out.
Serve With
You can use this crust to make your favorite pie such as apple, chocolate, or even custard pie.
Variations
- You can also add spices such as cinnamon or nutmeg to the pie crust for a different flavor.
- If you are not a fan of shortening you can use all butter to make this simple recipe.
FAQs
Yes, you can blind bake a pie crust without weights using dried beans or rice. Just cover the pie crust with parchment paper and fill it with your preferred weighting agent then press them down to the edges of the crust.
No, since you are using weights you will not need to poke holes in the crust.
If you don't use some time of weights your pie crust will puff up and the bottom won't be flat when you add your filling.
Related Recipes
- Do you like pie but don't want to spend time making a pie crust? This No Bake Key Lime Pie is the perfect pie recipe to make when you are in a hurry.
- Pumpkin Pie with Phyllo Crust is a delicious twist on the classic pumpkin pie and you won't have to worry about blind baking the crust.
- Hula Pie is an easy no-bake pie that you can make in minutes without having to blind bake the crust.
- If you find yourself out of nutmeg but need it for your recipe I've got the perfect solutions for you. Keep this Nutmeg Substitute guide handy in your kitchen.
- For a step-by-step guide on creating the perfect base for your desserts, check out our detailed post on how to make a graham cracker crust.
First published Nov 24, 2018 . Last updated Sep 22, 2023 with important tips, clear step by step images.


Leave a Reply