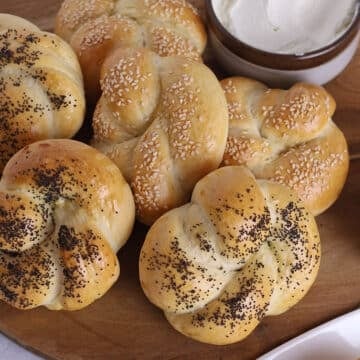
Pita bread, also known as Lebanese, Arab or Syrian bread is a staple in the Middle East. Here is a quick and easy 4-ingredient recipe for the most delicious, pillowy homemade Lebanese pita bread you can ever have.
Next time, try this whole wheat pita bread version, you will be hooked.
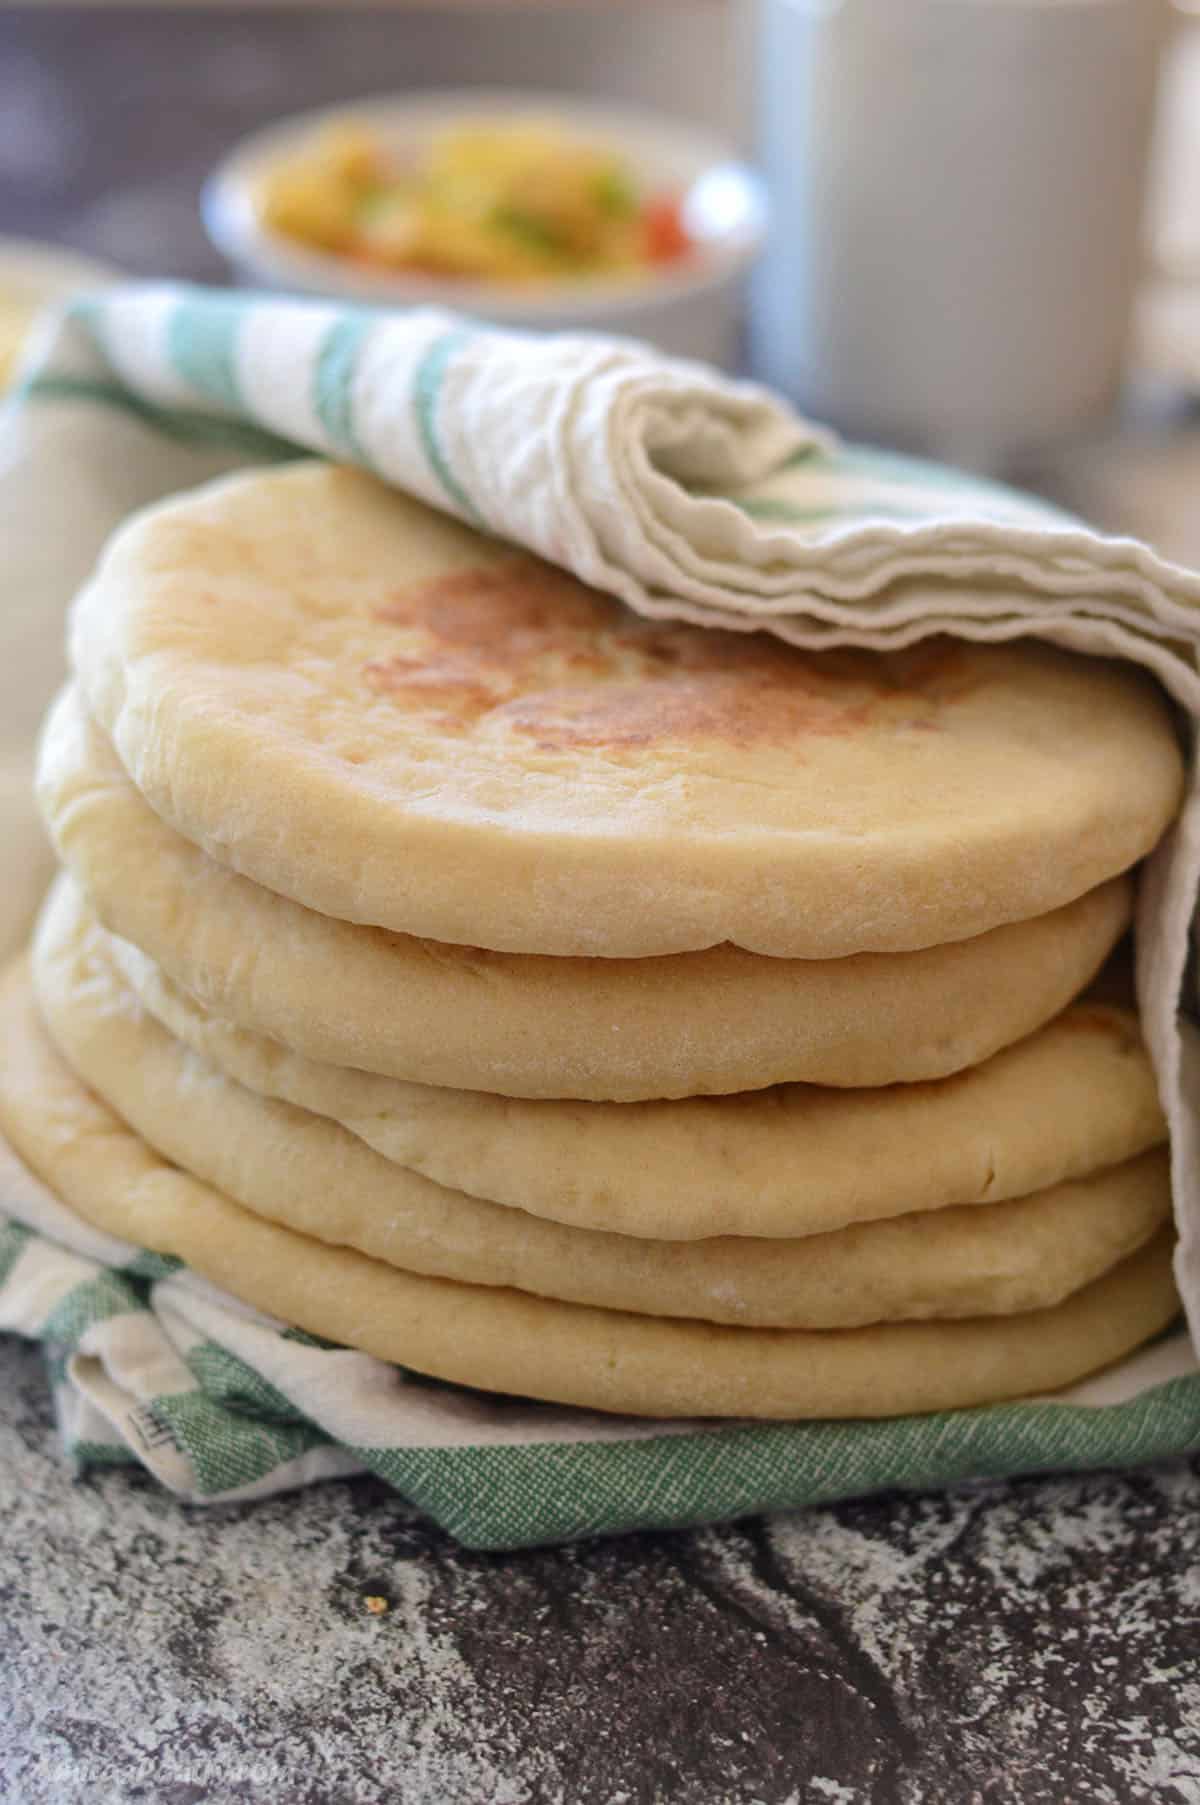
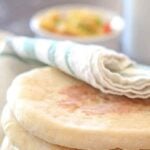
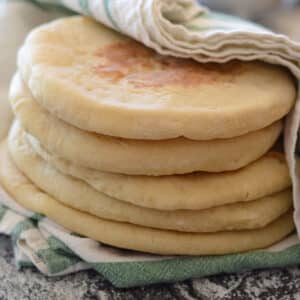
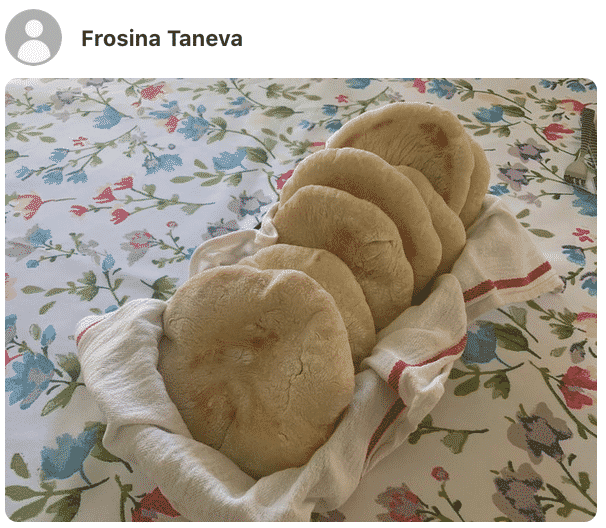
Each bite of a homemade pita bread is incredibly satisfying. Warm, soft and tastes bakery fresh. There is nothing like homemade bread and with this pita recipe you can have it in less than an hour.
If baking is your thing, I highly encourage you to try this recipe. It is a wonderful intro recipe for those looking to incorporate more homemade bread into their meals.
Jump to:
❤️ Why You'll Love It
- Fun to make!
- No oven required as you can make in your stove stop skillet or in your oven, if you prefer.
- Homemade pita bread made with easy pantry ingredients in less than an hour and with only 30 minutes of rising time.
- Tastes bakery fresh and better than store bought.
- Make the pita bread as thin or thick as you like.
- Stuff them with your favorite ingredients.
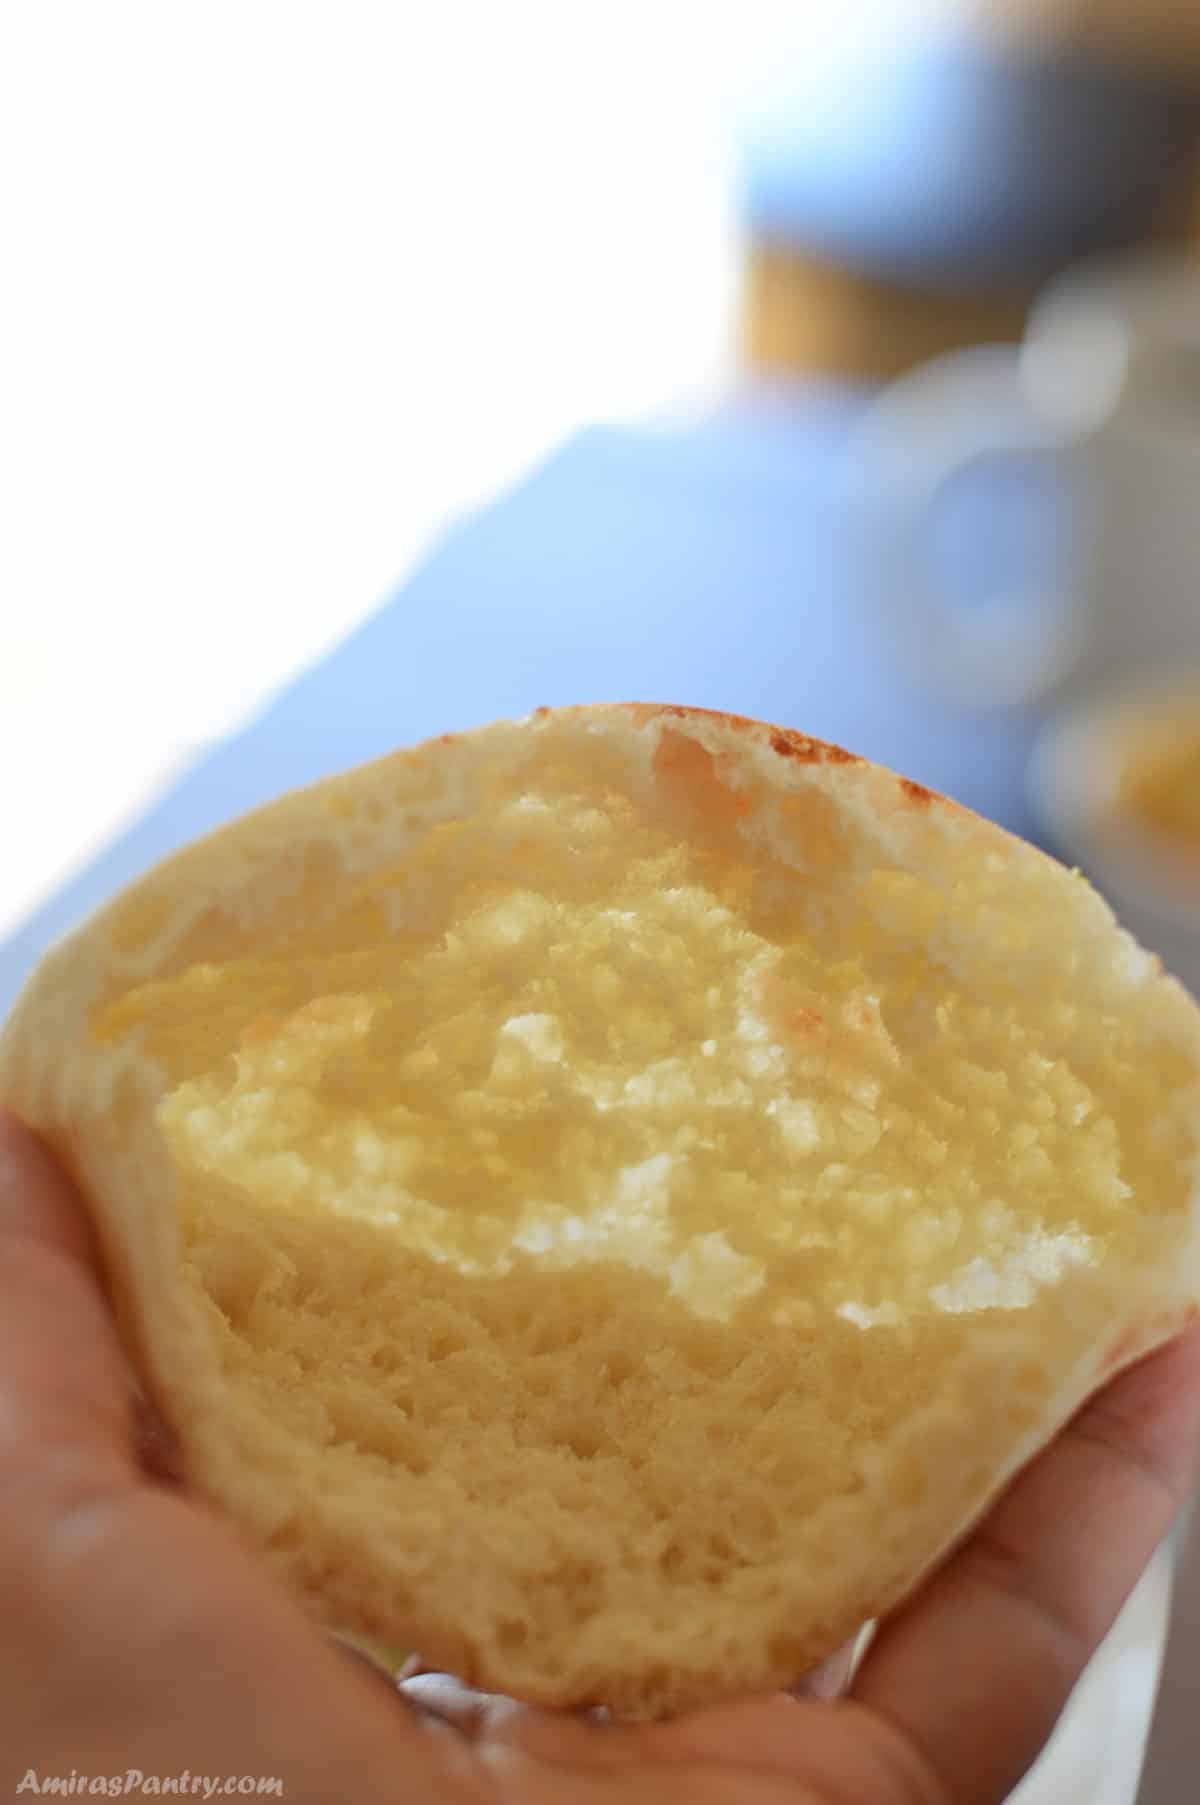
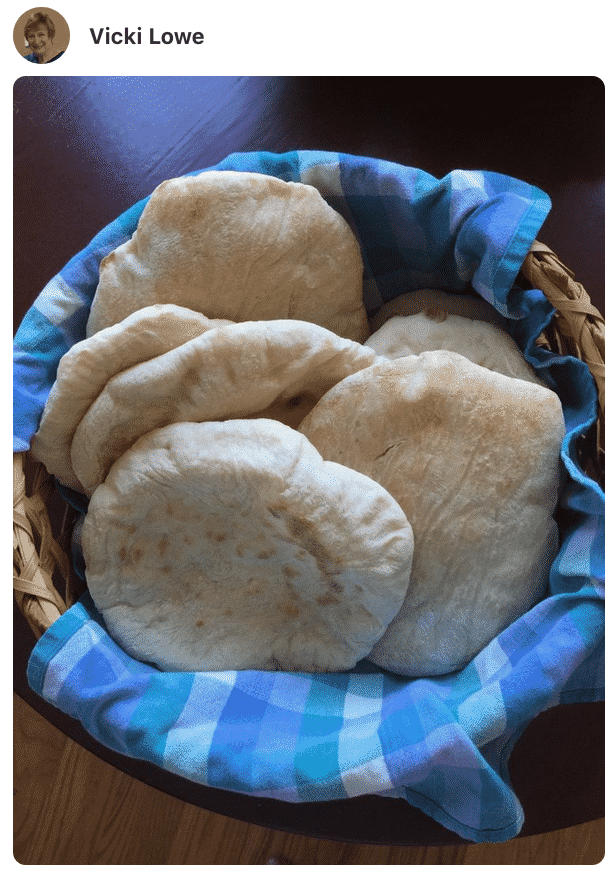
If you have ever purchased pita bread at the store then you may have noticed most are thin, dry and usually rip when you stuff or even pull open the pocket. This, my friends, is not that. Homemade pita bread is a game changer. Amazingly soft and only a little time to make. You won't ever want to buy store bought pita bread again!
Ingredients
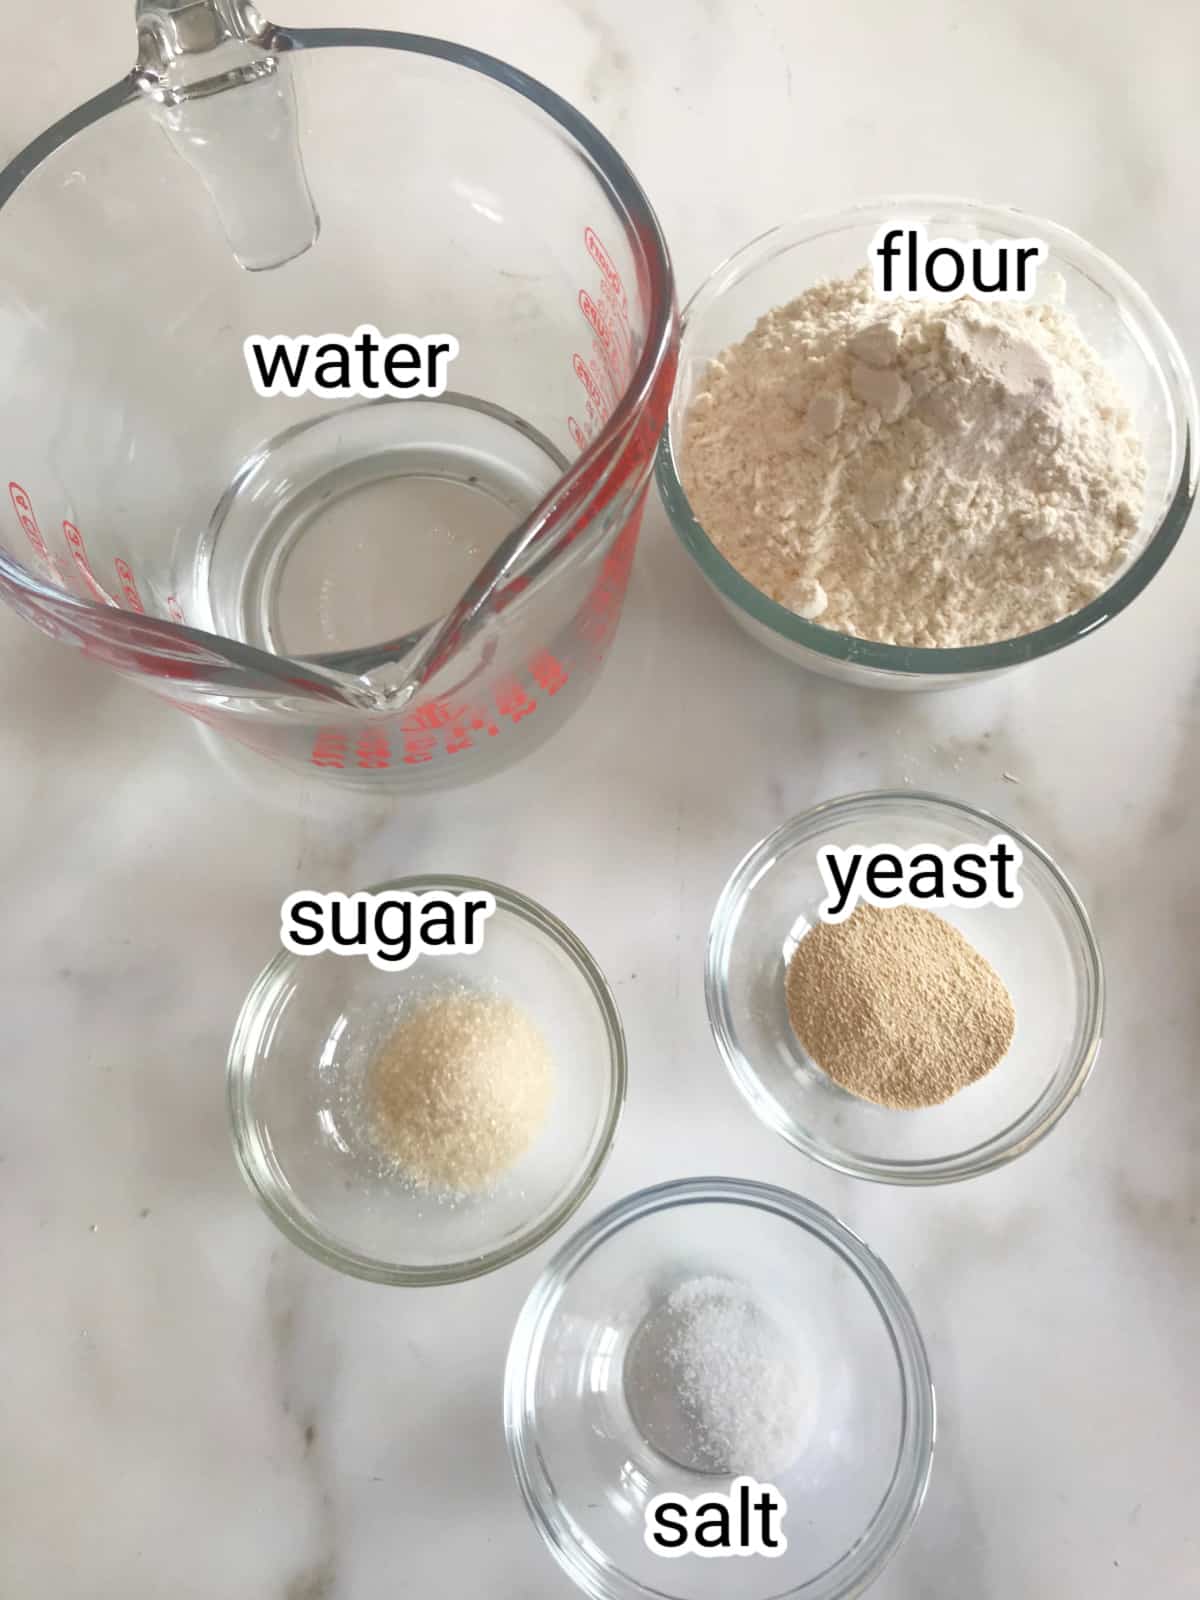
Ingredient Notes
The following are affiliate links. We are a participant in the Amazon Services LLC Associates Program, an affiliate advertising program designed to provide a means for us to earn fees by linking to Amazon.com and affiliated sites.
- Flour: Bread flour is preferred in this recipe, although I have used all-purpose. See my notes in the recipe card on how to make your own bread flour.
- Yeast: Active dry yeast is used in this pita bread recipe. Be sure the yeast has no expired.
- Water: Lukewarm water is used to activate the yeast along with the sugar. Water temperature should be about 105 -110 degrees.
- Sugar: Activates the yeast.
- Salt: Is optional but preferred for better taste.
- Oil: Is used to cover the dough the dough so it will not get dry or stick to the bowl sides while rising.
Instructions
Note: This is an overview of the instructions. The detailed instructions are in the recipe card below.
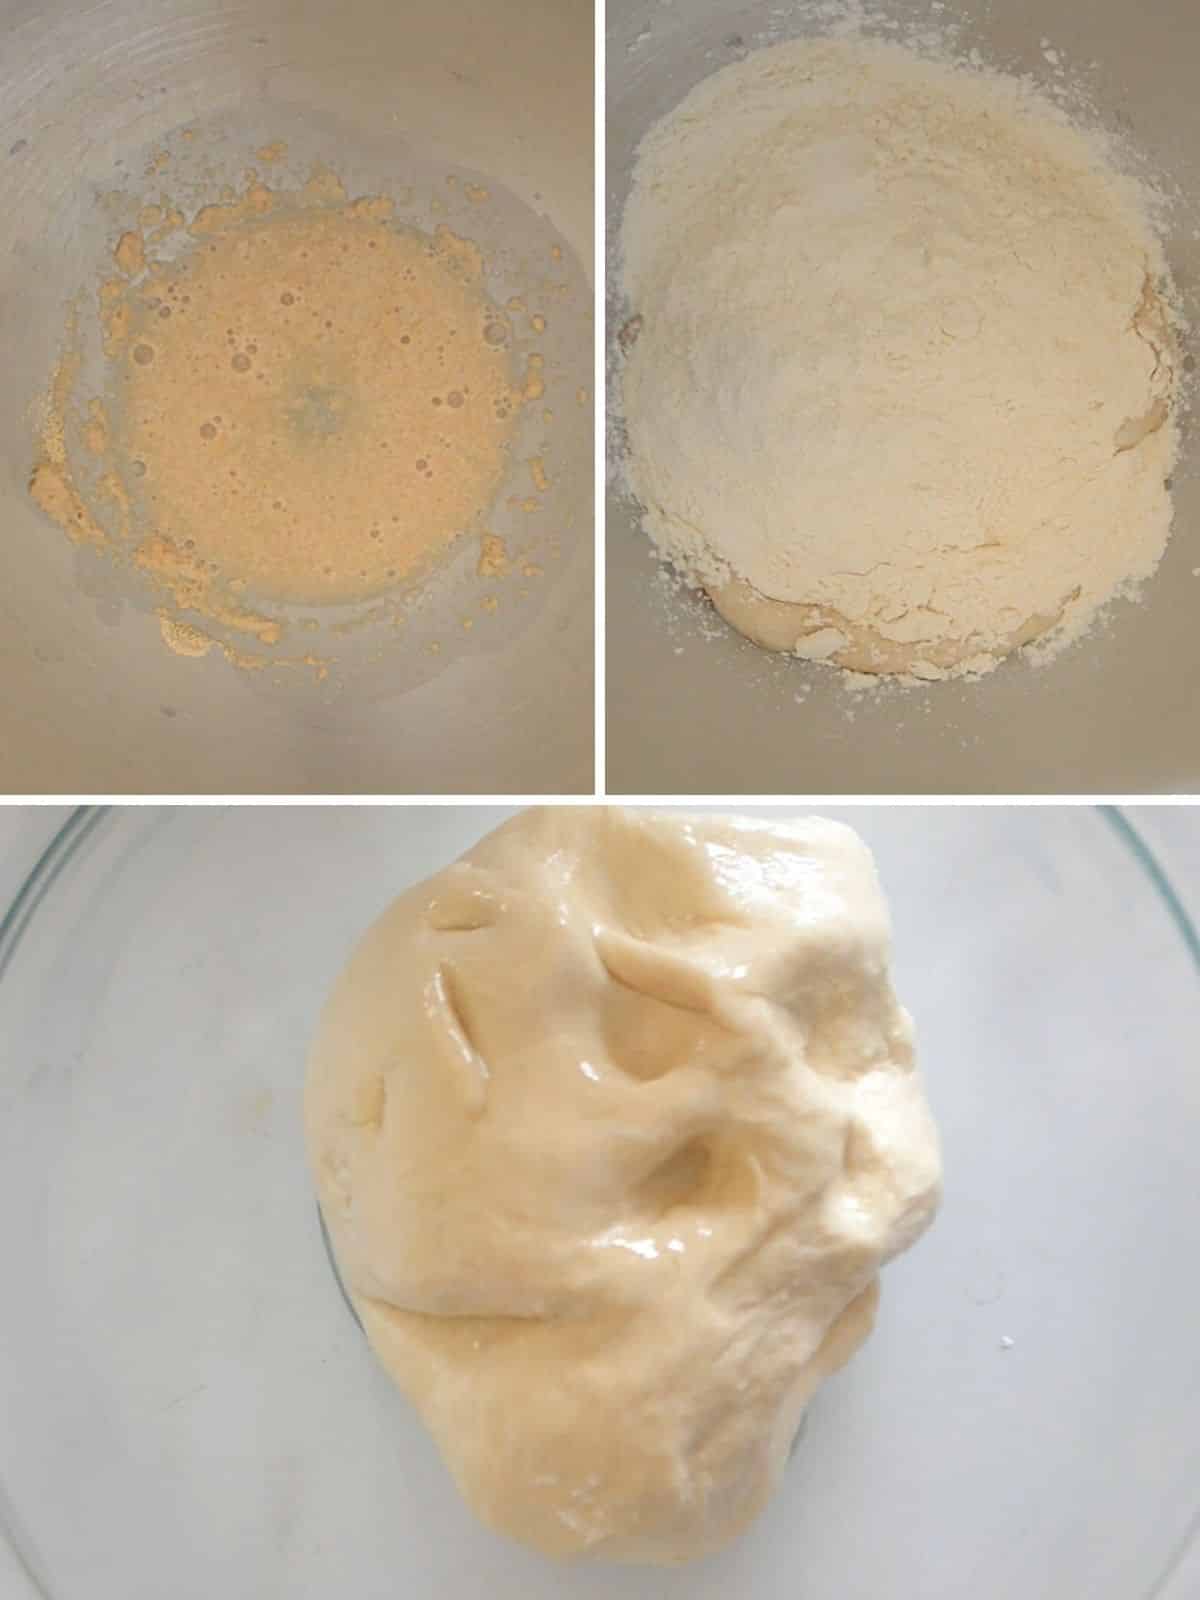
- Dissolve sugar in about ¼ cup of lukewarm water then add yeast and leave it for about 5 minutes.
- Add the rest of the ingredients to a stand mixer fitted with a dough hook or mix with a wooden spoon and then knead by hand until you get a smooth elastic dough.
- Place dough in a bowl with a teaspoon of oil, turn dough in all directions to cover with oil. Cover with plastic wrap and leave it to rise for 30 minutes.
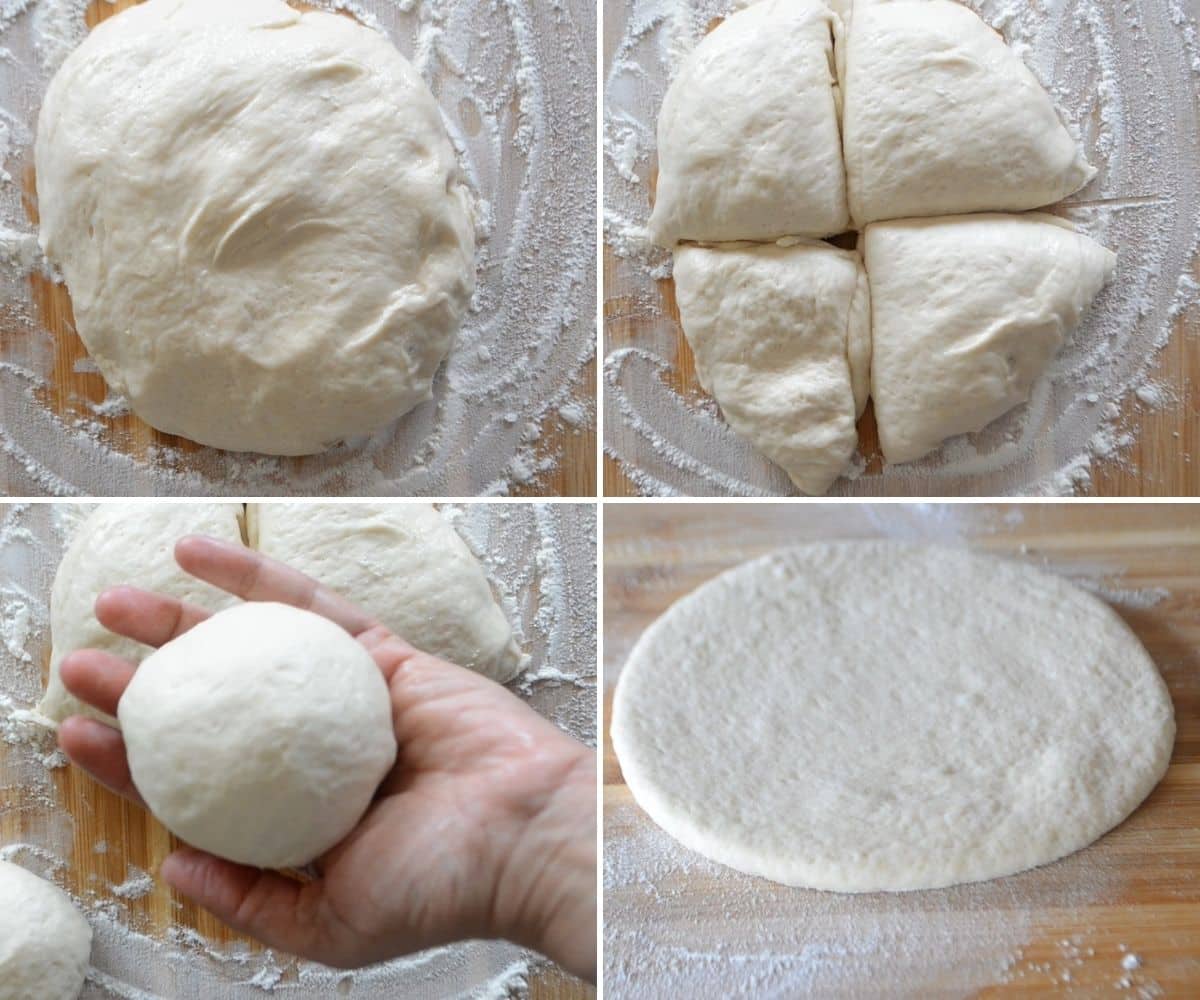
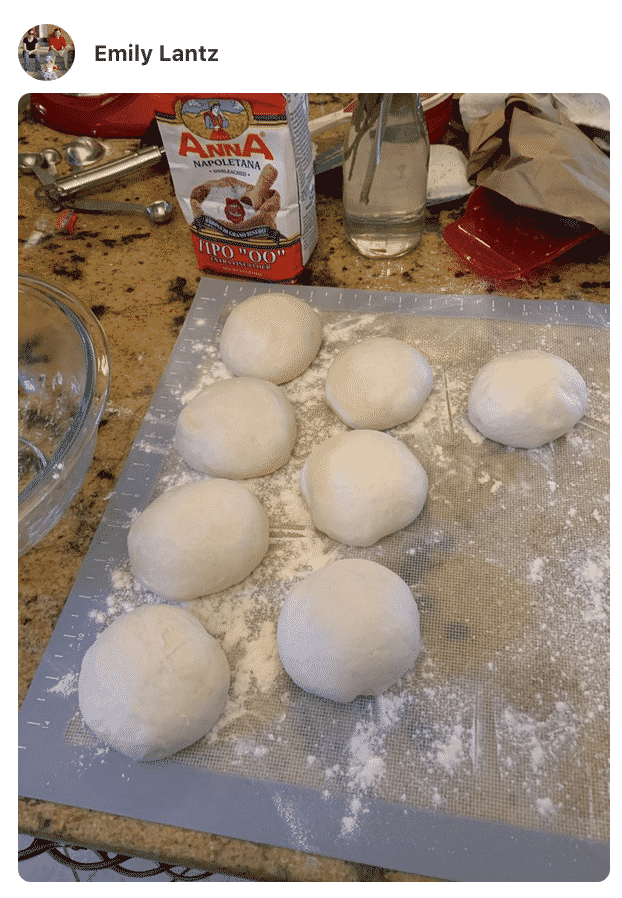
- Turn the dough out on a lightly floured surface.
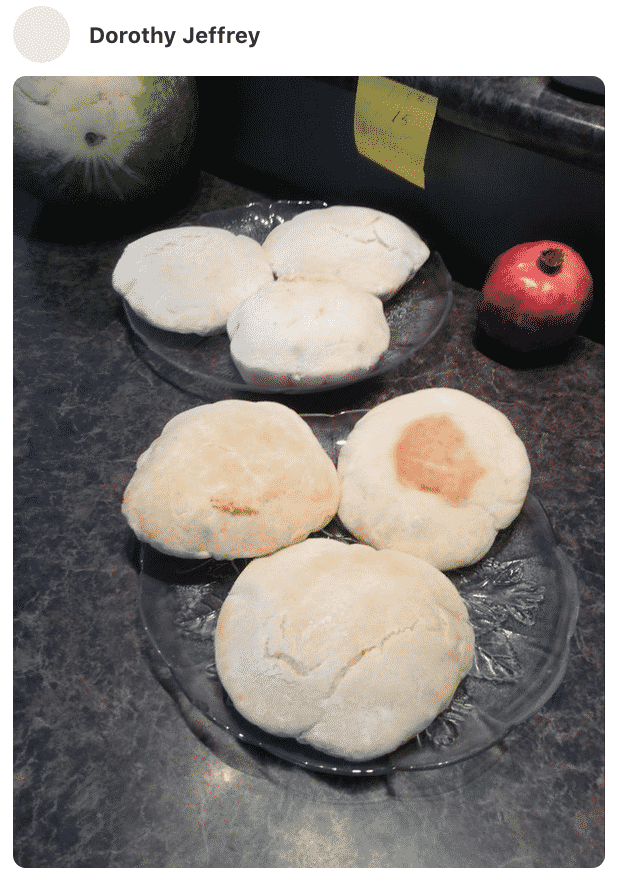
- Divide the dough into 4 equal parts. Form parts into dough balls dusting lightly as you roll them and set them aside covered.
- Take one ball and flatten it a bit with your hand. Roll the dough into rounds between ¼" and ⅛" thickness.
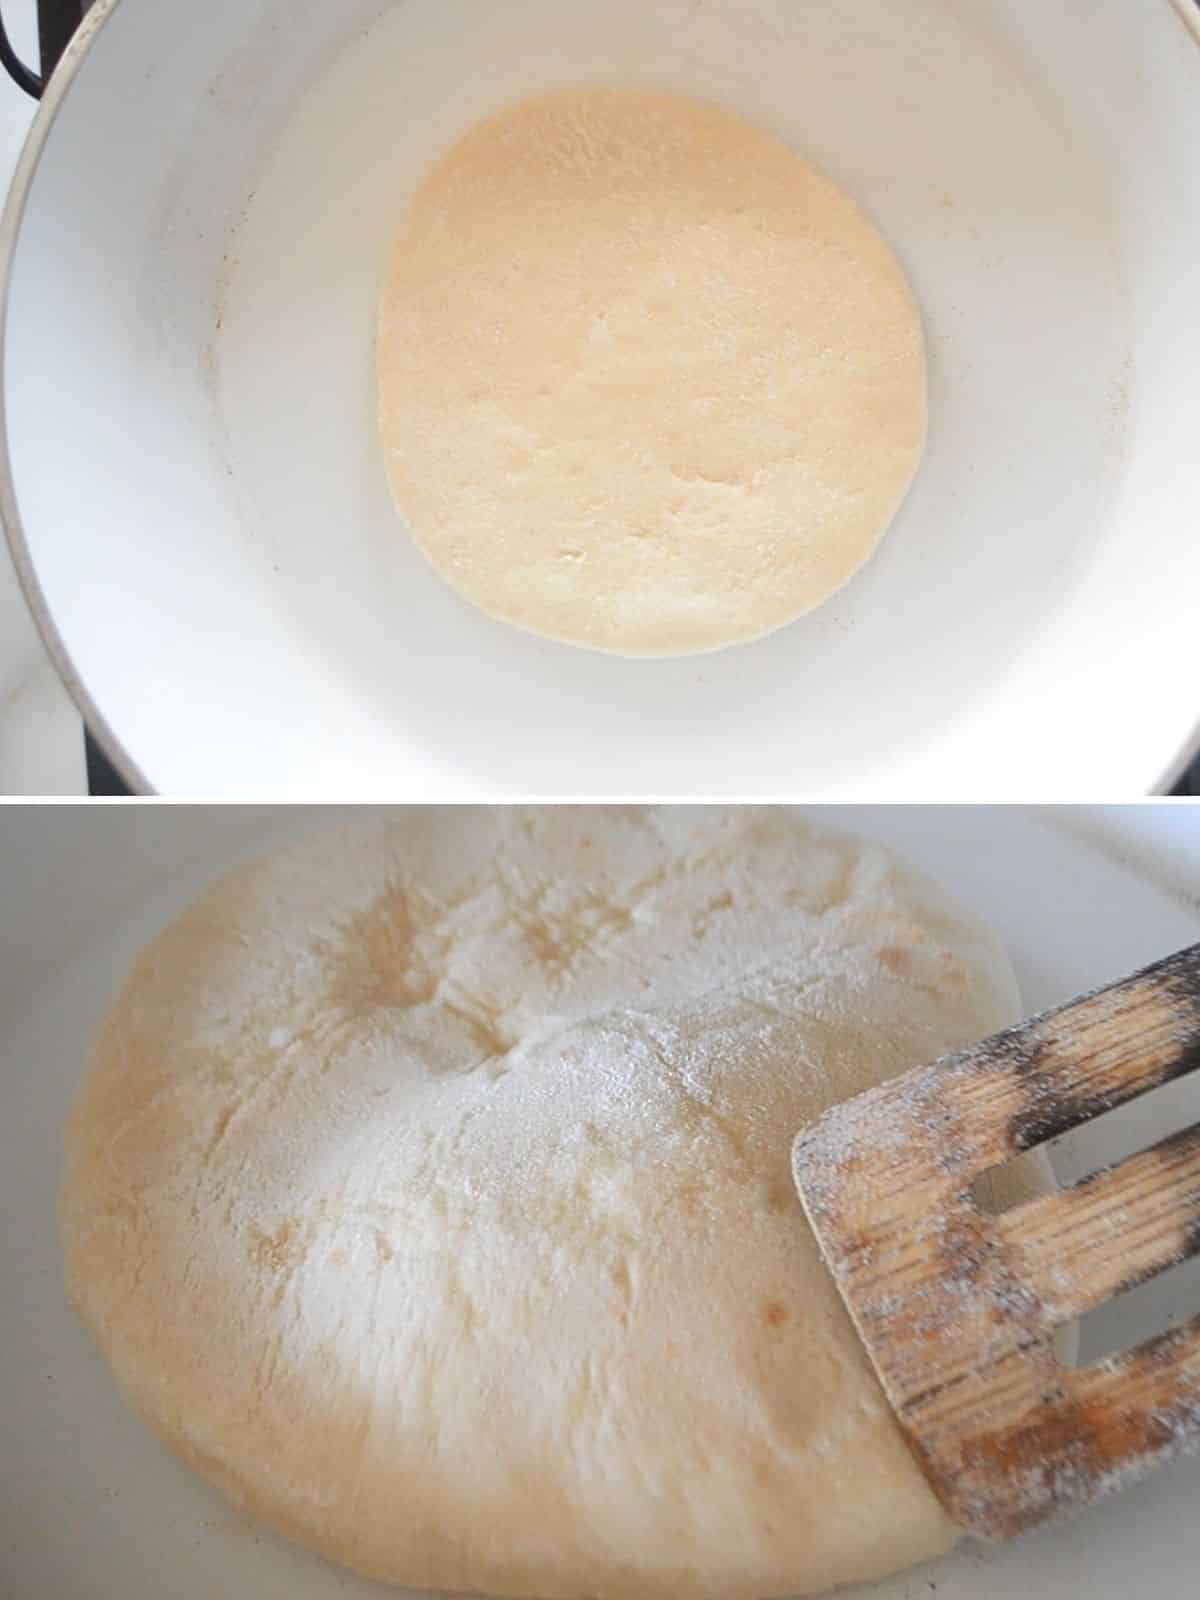
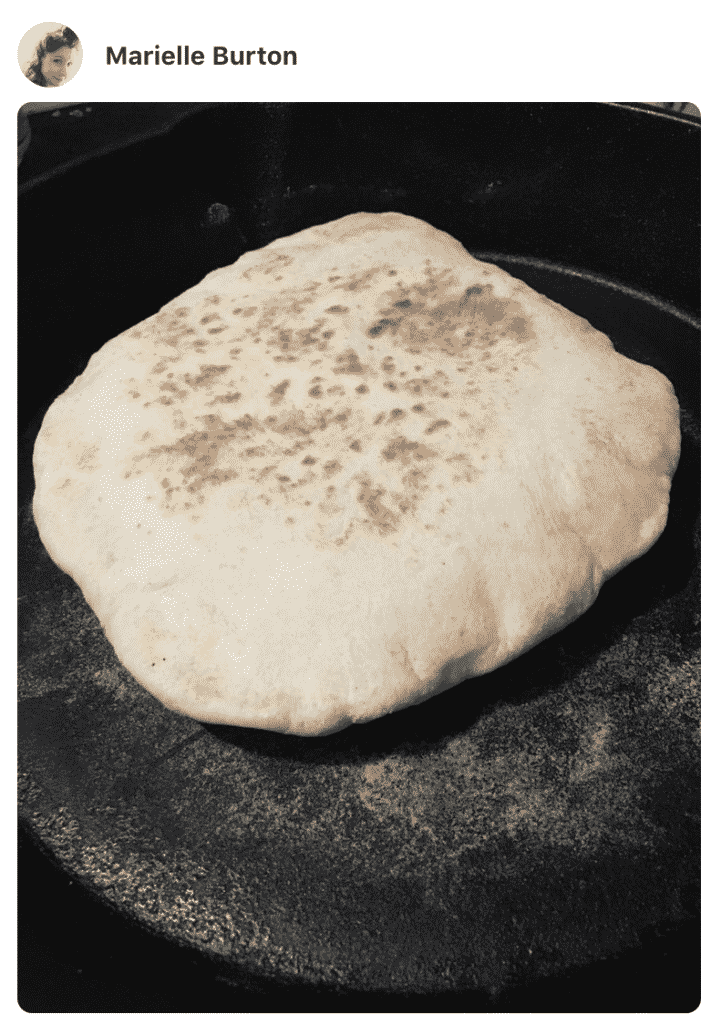
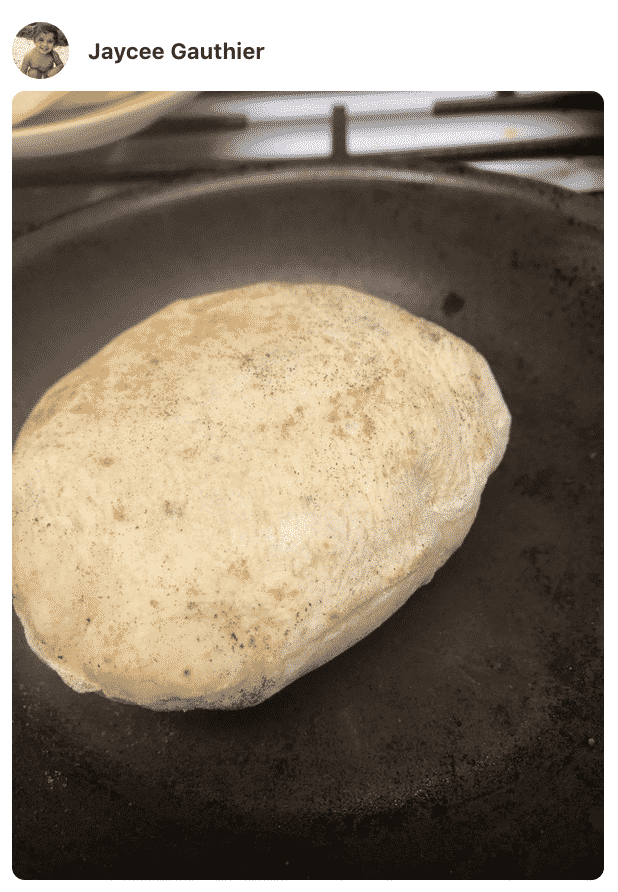
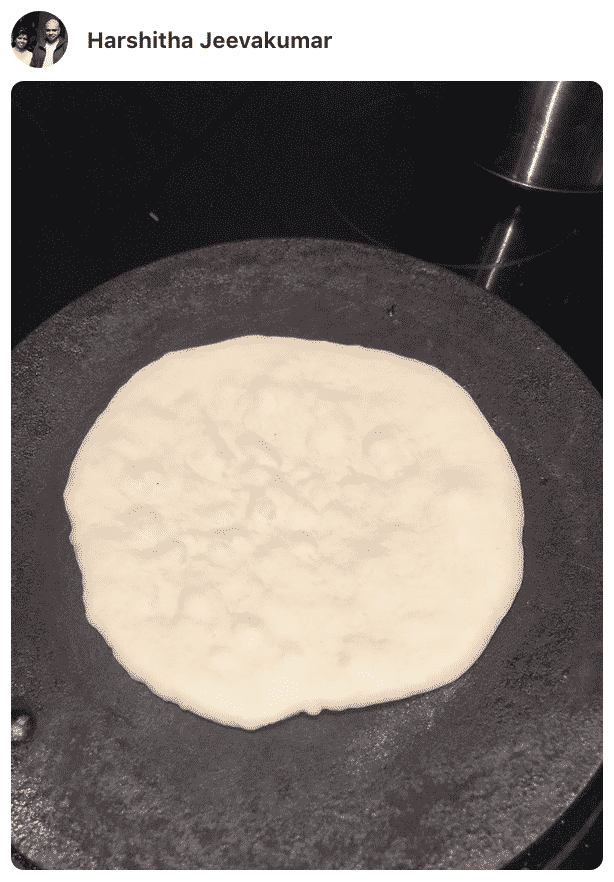
- Heat a non-stick skillet on stove top and carefully place the dough round in the hot skillet. Wait for it to start bubbling, flip it over and wait another 30 seconds pressing lightly with a wooden spoon or spatula. Keep turning the dough every 20 seconds or so and be patient, it will puff.
- You can also bake your pitas in the oven and I've included instructions in the recipe card below.
Things to Know
- If you don't have a mixing bowl with dough hook, you can mix ingredients using a wooden spoon and then knead by hand until you get a smooth elastic dough.
- Make sure not to poke the pita dough after rolling with your fingers or leave marks accidentally with your nails as this will make the dough unable to puff. You can roll the dough on a piece of parchment paper and lift it with the parchment paper to avoid leaving marks. Bake with the parchment paper on and then take it off after it puffs.
- When making the pitas in the oven, be sure to give the pan about a minute to re-heat between baking pitas.
- When making the pita bread on the stove top, take the pan off the heat after you make one pita. Roll out the next pita and then heat the pan for 20-30 seconds before making the next.
- Spraying with water method: this technique ensures even and consistent puffing of the bread in the oven. Just fill a spray bottle with water and when you toss the pita bread in the oven, spray it once or twice.
- For softer pockets roll them between ⅛" and ¼" and do not over-bake in the oven.
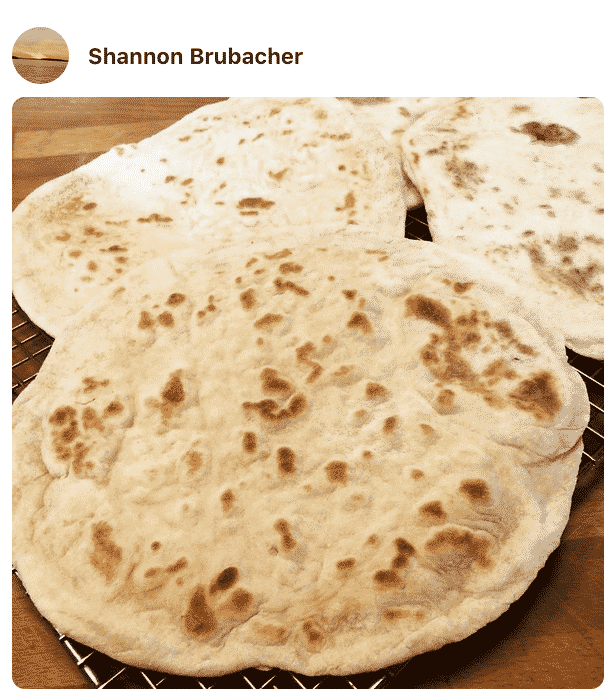
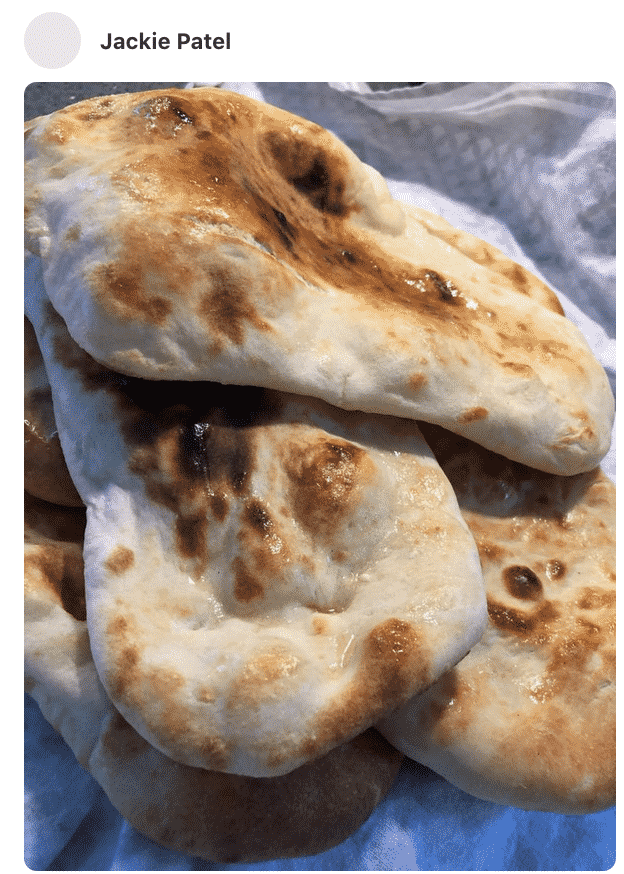
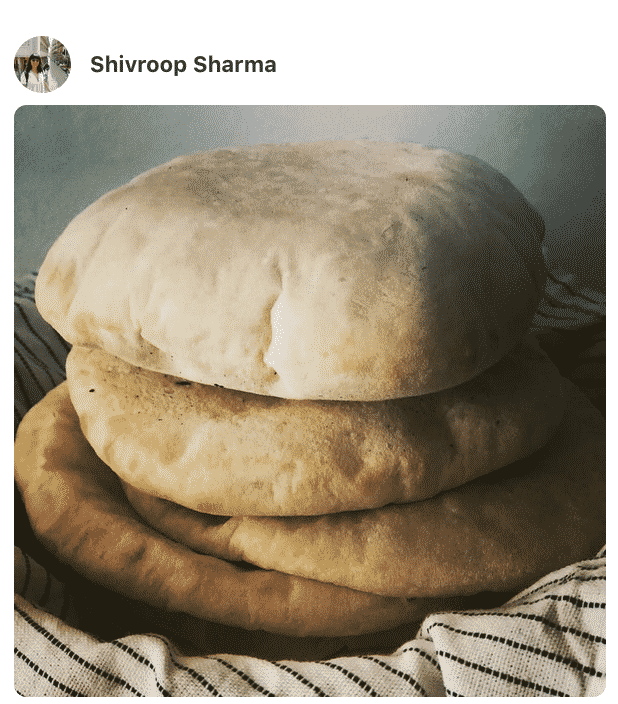
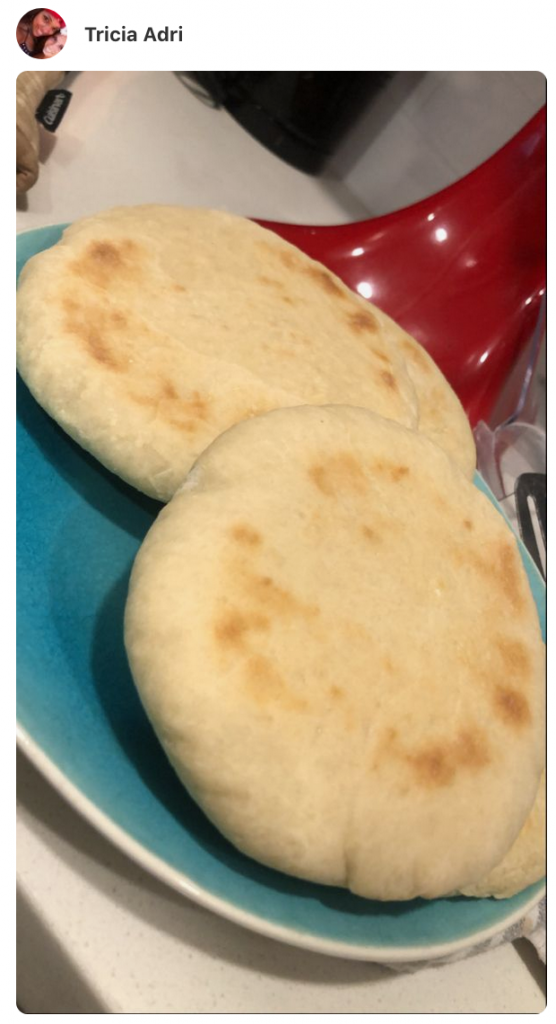
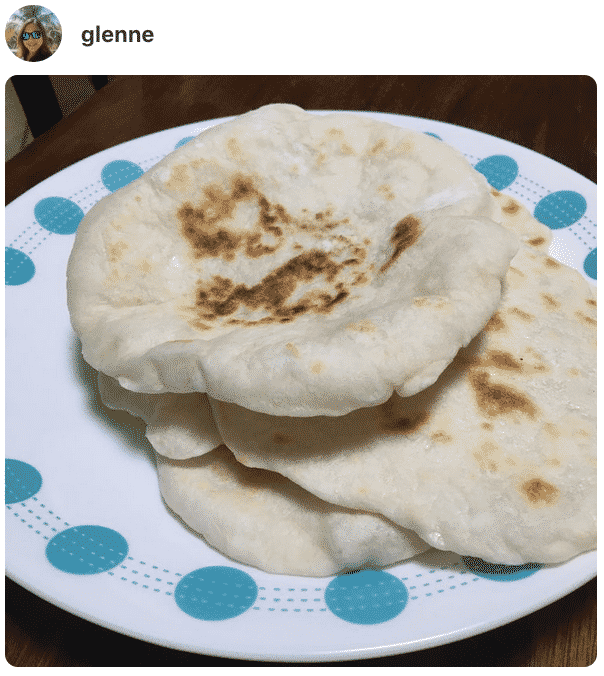
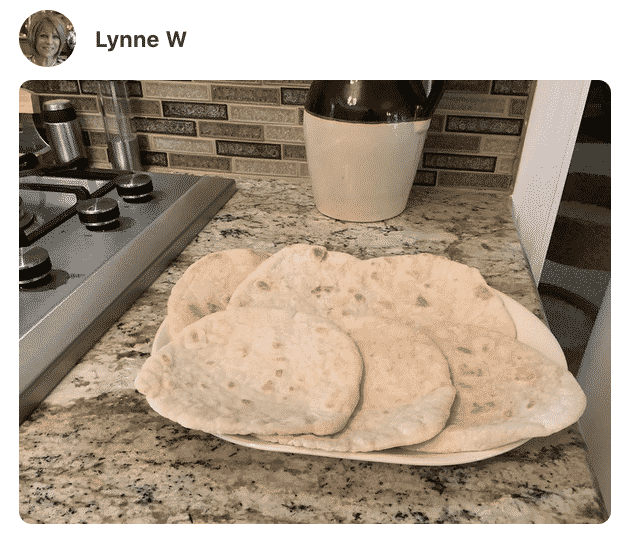
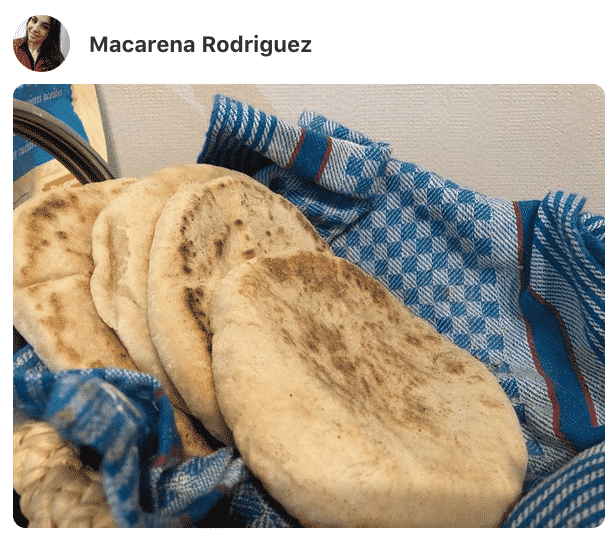
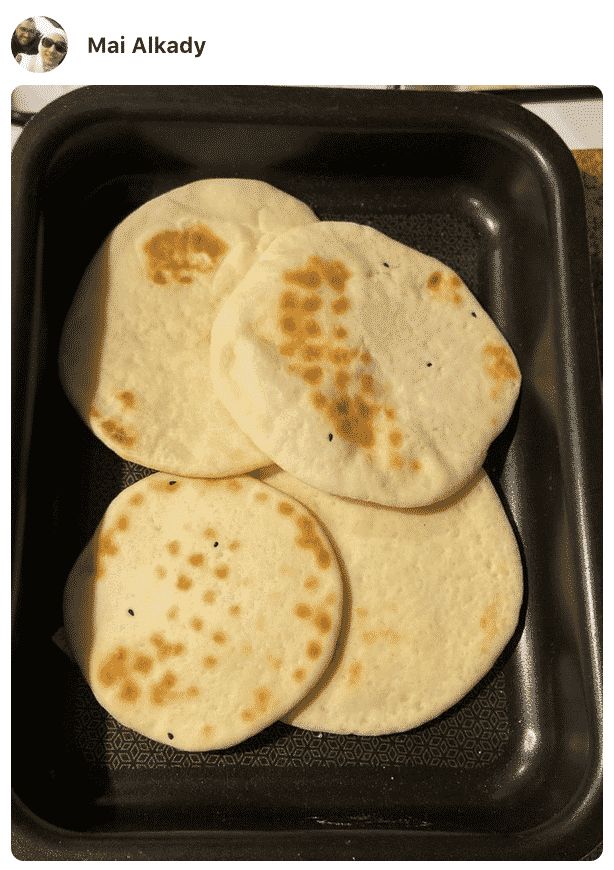
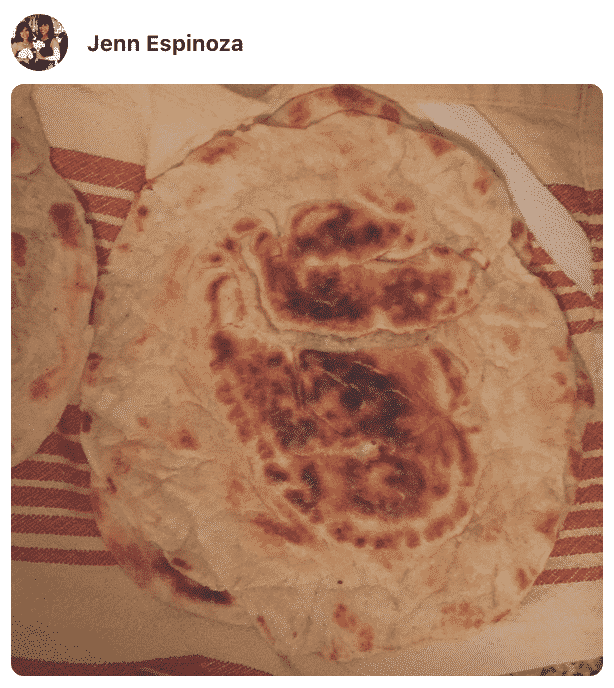
- Homemade pita bread should be puffed and looking a little 'dry' but not really browned.
- If your pita bread does not puff up, do not give up, bread making is all about making mistakes and getting to know your ingredients better. Besides, this recipe will give you great tasting bread either way.
How to Store Pita Bread
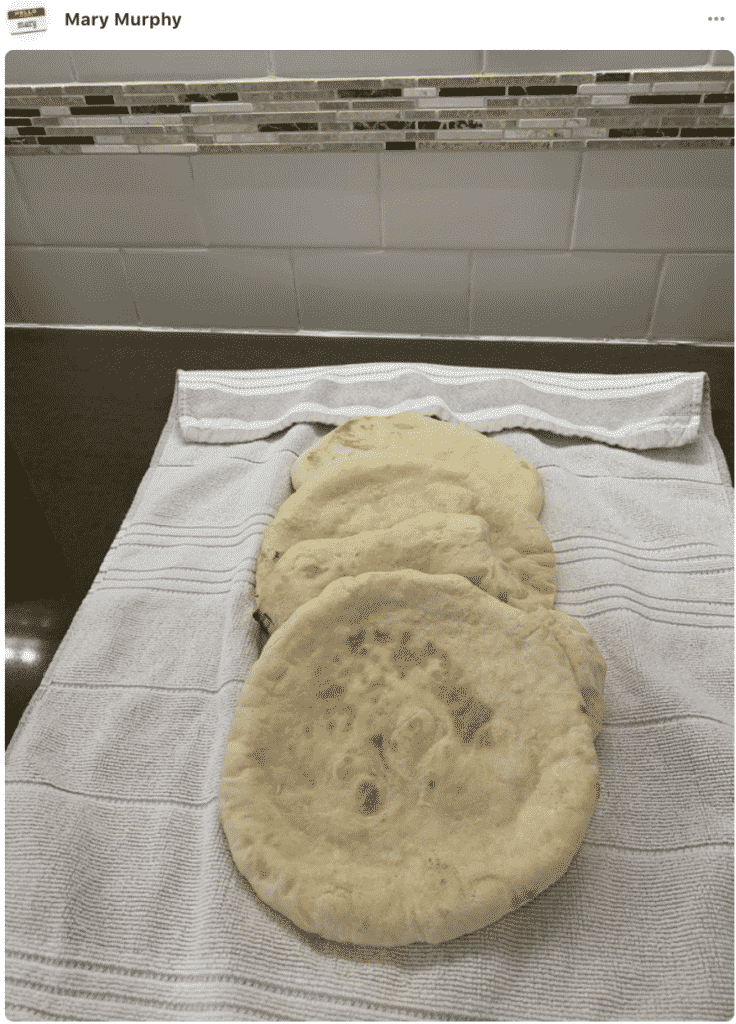
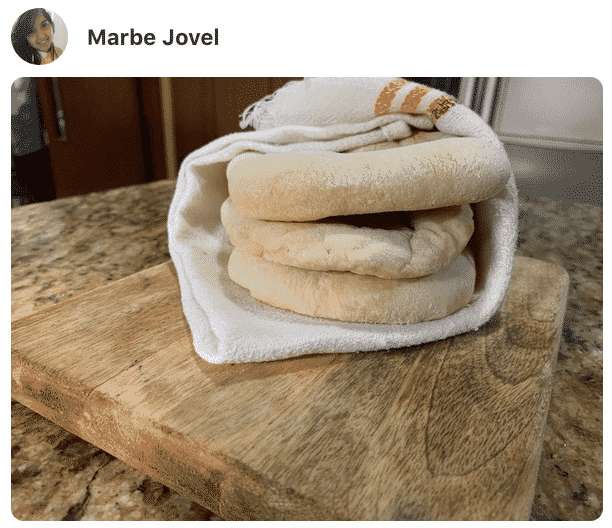
- Fully cooled pita bread should be stored in a paper bag on your bread box for up to 3-4 days.
- You can also freeze the bread by letting it cool completely and wrapping each one before storing in your freezer.
FAQs
Naan bread is usually contains a dairy product like eggs or yogurt where as this pita bread is dairy free.
It may have been because the oven or skillet wasn't hot enough. With the oven method, warm up the pan in the oven before putting the pita bread dough on it. If you're using the stove top method, heat up the skillet or choose a cast iron pan which gets much hotter than an aluminum or stainless steel skillet.
If your bread is frozen, wrap in a clean kitchen towel and heat in the microwave for 15 seconds intervals until soft and warm again. I'm used to reheating room temperature pitas on open flame for 10 seconds on each side.
Make Ahead
- Pita bread dough can be made ahead of time and stored in the frig after it has risen for up to a week. Be sure to keep it covered.
What to serve with pita bread
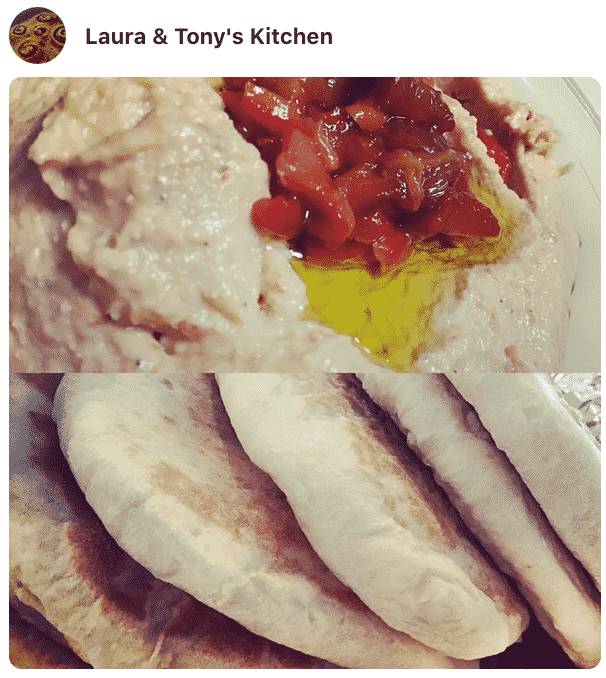
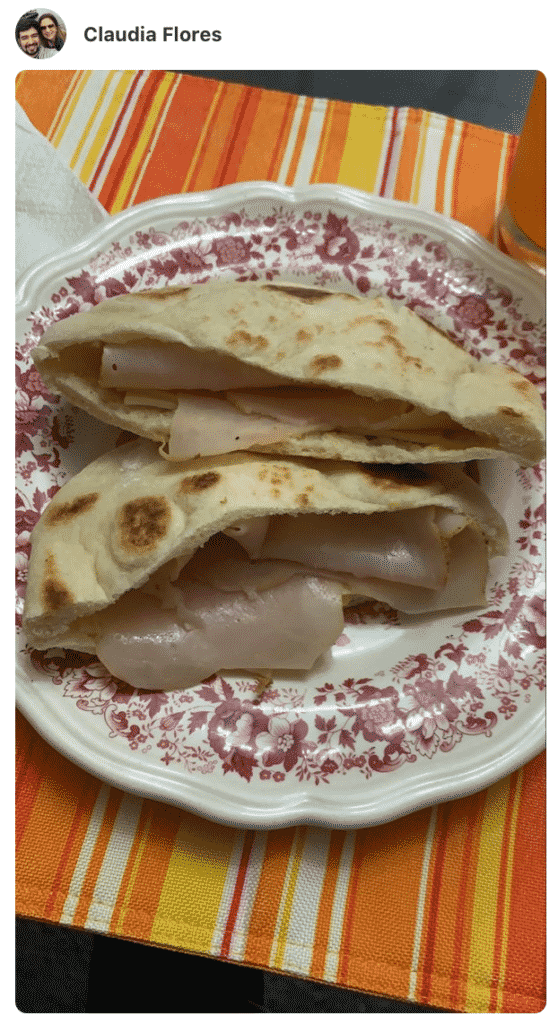
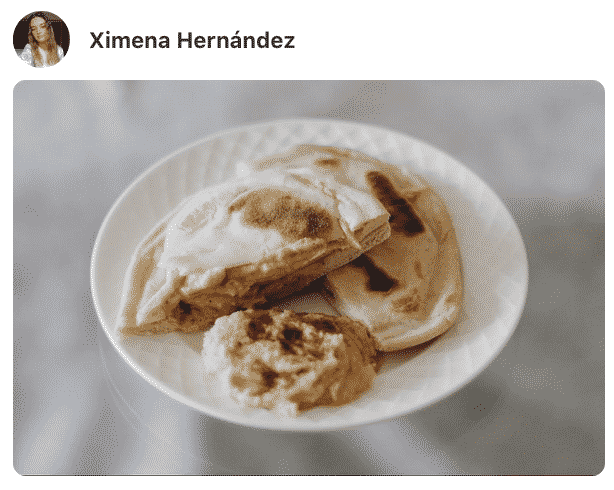
Homemade pita bread is soft, a little chewy and puffs up while cooking. It is this pocket of air that is created that enables the pita to be cut in half and stuffed with your favorite falafel, salads and sliced meat.
- Or rip a piece off and dunk into your favorite dips like hummus , tahini or baba ghanoush.
- Serve it with soups like Turkish lentil soup, tomato soup or eat with Molokhia and okra stew.
- There are many meals and recipes using pita bread too like this Egyptian Hawawshi recipe or make this chicken shawarma fatteh.
Variations
- Once you've made this recipe, you may want to change it up by adding your own fresh herbs and seasonings to the dough. Additions should be added before the dough rises.
- You can add a touch of garlic or onion powder. Fresh herbs like rosemary or dill.
- A touch of chopped up onions or even shredded cheese can also be added to the dough.
Related Recipes
- Try this skillet Middle Eastern flatbread, rich and very soft.
- Have you ever tried the Taboon bread, it will be a wonderful addition to your flatbread recipes.
- Turkish Simit is a beloved traditional street bread with a unique sesame-crusted exterior. Also known as Turkish sesame bagel thiis bread is great with a cup of tea or with feta cheese.
- If you are looking for some flatbread without yeast, check out this ever popular yeast free bread recipe.
- This hot dog bun recipe makes soft and fluffy buns perfect for holding your favorite hot dog or burgers. With simple ingredients enjoy freshly baked buns right from your own kitchen.
- Whole wheat pita bread is a nutty soft pita bread made from whole wheat flour mixture. Great for making falafel sandwich, dipping in Hummus or using using to mop up stews and soups.
- Poori is an Indian fried bread made with simple everyday ingredients and often enjoyed with potato curry or chana masala.
Lebanese Pita Bread Recipe
Equipment
- Mixing bowl
- Skillet or baking sheet
Ingredients
- ½ Tablespoon active dry yeast
- ½ Tablespoon sugar
- 1 cup lukewarm water
- 2 cups bread flour 255g
- ½ teaspoon salt
- 1 teaspoon oil
Instructions
- Dissolve sugar in about ¼ cup of the lukewarm water and then add the yeast and put it aside until it becomes bubbly about 5 minutes.
- In a deep bowl, or your mixer bowl, add flour, salt and mix well. Add the yeast mixture start mixing and add the warm water gradually until your dough comes together.
- Knead until it forms a smooth, elastic dough. Dough should be a bit moist.
- Add the oil to a bowl, transfer dough to the oiled bowl and turn it around to cover lightly with oil. Cover and let it rest for 30 minutes.
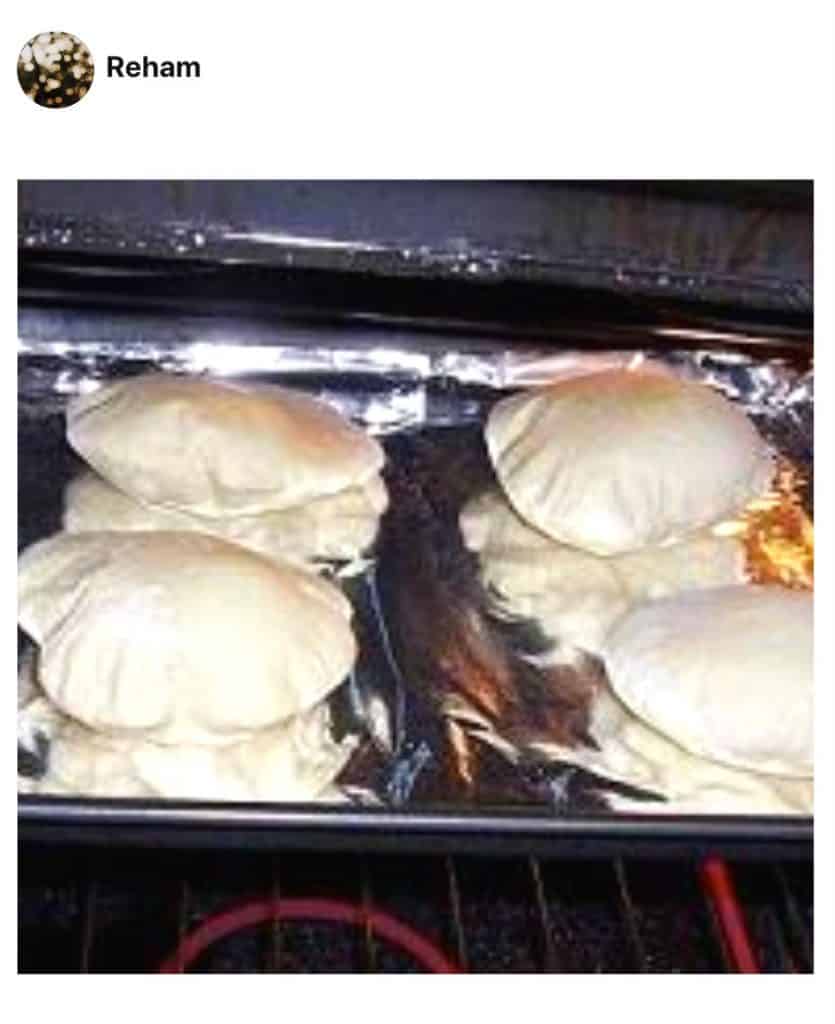
- Meanwhile, heat oven to 500F degrees and put your baking sheet in there to heat up.
- Turn the dough onto a clean, lightly flour dusted working surface.
- Divide dough into 4 equal parts and form each part into a ball. This of course depends on how big you would like your pita bread to be. Return balls to bowl and cover. We will work on them one at a time.
- Take one ball and place on the work area, flatten lightly with hands then roll using your rolling pin to flatten to desired size. (We like our bread ultra thick and chewy so I roll mine to almost 6 inch circle).
- Lift the dough circles carefully, making sure not to poke it with your fingers and place on your baking sheet. If your baking surface is large enough put two or more together.
Oven method
- The dough should puff nicely about one and a half minute through baking. Turn it to the other side to complete baking for another minute.
- If you want soft pita, do not let it brown in the oven just pale with few brown spots. If you like a hard and crunchy top, leave it in the oven until it browns nicely all over to your perfections.
Stove top method
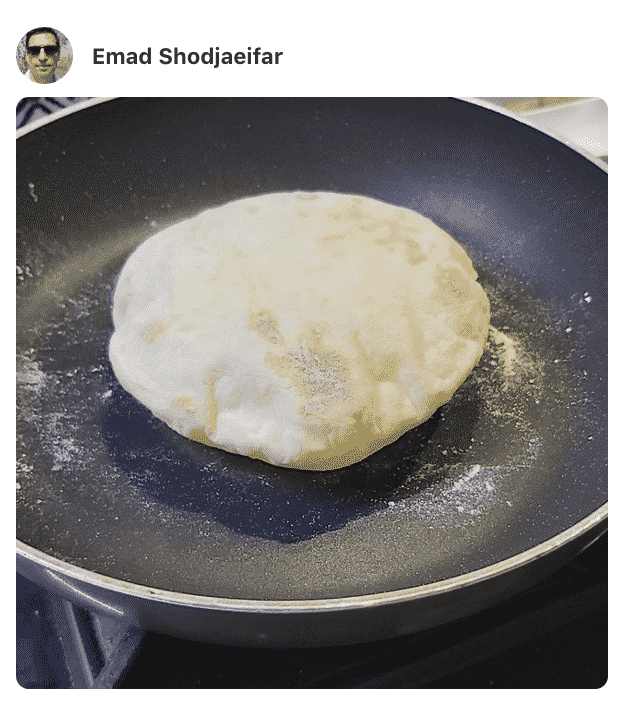
- Heat up a non-stick skillet on medium-high then place each circle right after rolling carefully on the skillet.
- After 30-45 seconds it should start getting bubbles, turn it to the other side for another 30 seconds.
- Keep turning the pita on each side pressing with a wooden spoon to help the bubble grow making the pita puff all over.
- Take the bread out and cover with towel.
- Take the skillet out of the heat and roll the next ball, return skillet to heat up again for about 20 seconds and repeat the process.
- Make sure to cover the bread after baking in t he oven or the skillet until you are done with the others to keep it soft.
Video
Notes
- You can make your own bread flour by adding 1 teaspoon of vital wheat gluten to every cup of AP flour. You can also use AP flour but the resultant bread won’t be as chewy.
- You can use heavy duty baking sheet , large cast iron or a pizza stone in the oven to heat up. You can also bake the bread on stovetop, my preferred way.
- If you don't have a mixing bowl with dough hook, you can mix ingredients using a wooden spoon and then knead by hand until you get a smooth elastic dough.
- Make sure not to poke the pita dough after rolling with your fingers or leave marks accidentally with your nails as this will make the dough unable to puff. Use can use parchment paper to roll the bread ball on and lift it with the parchment paper to avoid leaving marks. Bake with the parchment paper on and then take it off after it puffs.
- Oven method: When making the pitas in the oven, be sure to give the pan about a minute to re-heat between pitas.
- Stove top method: When making the pita bread on the stove top, take the pan off the heat after you make one pita. Roll the next pita and then heat the pan for 20-30 seconds before making the next.
- Spraying with water method: this technique ensures even and consistent puffing of the bread in the oven. Just fill a spray bottle with water and when you toss the pita bread in the oven, spray it once or twice.
- For softer pockets roll them between ⅛" and ¼" and do not over-bake in the oven. Pita bread should be puffed and looking a little 'dry' but not really browned for the best taste.
Nutrition
Time to show you off!
First published Sep 28, 2019 . Last updated June 7, 2022 with important tips, clear step by step instructions and readability.


Haakon Larsen
I had never made homemade pitas in my life until I saw this recipe and man, it was killer! Loved every single bite; this was high quality!
Amira Ibrahim
Haakon, thank you so much for your lovely comment. I am so glad that you found my recipes tasty.
Carla
My go to recipe, that works flawlessly everything.
Amira Ibrahim
So happy to hear that.
Jamie Valdez
Hi Amira,
Thank you so much for sharing this incredibly easy but delicious recipe to make homemade pita bread. I've tried a couple other recipes and none compare to the fluffy, slightly chewy pita. Also, I have not bought store bought pita ever again because just like homemade tortillas there is just no comparison to having the real thing 🙂
j
Never buying pita bread again. This made the perfect amount for my family.
Julie Ann
This recipe is absolutely the best. My husband loves it. I use my cast iron skillet to cook the pita on the stove. And the secret really is to keep turning them every 30 seconds until they puff.
David Adkison
Thanks for sharing!
ForeverMama
These pitas turned out perfectly. Way, way better than store-bought. I followed all as directed, except for letting the dough rise until doubled (I actually did this via cold rise in the fridge overnight). The recipe indicates to “cover and let rest for 30 minutes”, but not sure if this is intentional? If yes, I’d like to try it to see how it turns out. Regardless, these pitas came out excellent. Thank you, Amira, for sharing!
Ethel Daher
Can this be made in a bread machine up to the dough cycle?
Amira
I haven't tried that Ethel. Please let us know if you did. Thanks
Eija Sipila
If you are baking in the oven, what is the temperature?
Amira
Put it on the max, mine was 500F.
Lina
Salam Aleikum, dear Amira,
I have tried baking bread several times, but I have a problem. I thought I had read something about it on your page, but I can’t find the section anymore. Maybe you can help me.
For me, one side of the bread turns out very thick, while the other side is too thin – almost like a sheet of paper. The bread always puffs up nicely, but the bottom side becomes much thicker. Do you know what I might be doing wrong?
I’m going to try your recipe today. Can you tell me how hot the pan should be? I always think it should be as hot as possible, but now I feel like medium heat might be better. What do you think?
Thank you so much!
Palette
I made these in the cast iron skillet first(using the directions exactly), but they didn't poof for me, still tasted great! Today I made them in the oven and all 4 poofed up nicelyl I guess it will be the oven for me:) Baked all 4 at one time on large half sheet pan. Thanks for the recipe!
Jay
Shukaran!! I made these today, using a cast iron skillet on the stove top. I just love the point when they start to puff up! I made the first one fairly thick, and the rest a bit thinner. I think I'm like you, I may prefer them a bit thicker! I did notice as a previous commenter did, my dough was pretty wet, so I did add a bit more flour. Next time I'll add the water a bit more gradually. I also didn't have active dry yeast on hand, so I used instant. Still worked perfectly! Thanks again for a great recipe 🙂
Amira
Thank you for your comment Jay, I am glad the recipe worked for you.
Sol
Absolutely scrumptious! This recipe has become one of my weekly staples!
Amira
Glad you liked it Sol.
Lola
I made these today for the first time. I've never made pita bread before. They are so much better than store-bought. I really am loving your recipes! Clear instructions and lots of tips which are very helpful! =)
dolores L
Thank you Amira, This is a very nice recipe that I have made and the family loves it.
Your instructions are great. I look at your site on the web often. Your are a great teacher and we thank you.
Amira
Thanks Dolores for your sweet comment. I'm glad the recipe worked for you.
Luci
This was my first attempt at making pita. Although I need to work on my frying technique, these got excellent reviews from my husband and myself, I will definitely make the recipe again and again. I also made your hamburger gyro — YUM! Thank you Amina
Pearl
Thank you for sharing this recipe. So much better than store bought (even the fresh baked store-bought ones that are thinner). Loved it!
Renee
Hi there!! I have been to Lebanese stores or restaurants that use a oven built into the wall, does a household oven produce the same product?
Amira
I would not say the same but pretty close.
Vani
Thank you Amira. I made these the other night and they were just what we needed. Will be making them again! Better that shop brought!
Leila Sarikus
Salam Amira......
Thank you so very much for,your recipes they are so easy to make.
I am trying different one almost every day.
Looking forward to learn a lot more from you.
Leila from Toronto Canada.
Abey
Made these over the weekend and they came out so delicious. Most of them puffed up though. I am not going back to store bought ones ever again.
Amira
Thank you so much Abey for your feedback, I am happy you liked them.
Corinne
Tried these tonight for lamb burgers. I had the same problem as Samaa and did the same thing. So, no puffy pockets. But the bread still was delicious and so much better than store-bought pitas or flatbread! Next time I’ll go slower adding the water. Can’t wait to try again!
Amira
Corinne, thank you so much for your feedback. Water is needed and it helps bread puff so make sure your dough has enough moisture though.
Phoebe
Can I make a bigger batch and freeze them? How long can they be stored ? thanks
Amira
Yes sure you can, it actually keeps in the freezer for months but it dries out the longer it stays there. I do not like keeping it for more than a month though.
Beck
This recipe lived up to its name, simple and easy. It came out great with us and I am going to make it over and over.
Amira
Thank you Beck, glad you liked the recipe.
Sarah-Eve
Hi Amira! Thanks for the recipe! I am trying this out this morning. I failed at making a pocket but it’s delicious sny!!
Amira
Sarah, thank you so much for trying the recipe out. Keep trying and you'll get it to form a pocket. Make sure not to tear the pita before baking as this sometimes happens through handling with our fingers.
Samaa
Hi Amira,
I followed the measurements, but the dough was really sticky and did not form a ball. Even after adding an extra 3/4 cup of flour to make it come together, it was still a bit sticky. Did I do something wrong?
Samaa
Amira
Samaa, have you used all purpose flour? Also flour varies, but 3/4th of a cup is too much!! I will make a note in the recipe to add water gradually too. I hope this helps.
Hind
I’ll like what you do but please can you take off your gloves. Cooking is all about touching and feeling the food so please I fill like in a hospital when I see someone cooking wearing gloves.
Thank you and good job.
Amira
Thank you so much Hind for your feedback. I understand what you are saying but the point is I am a home cook which means I am like my mama. Sometimes I have scars or burns from the oven on my hands and I hate for my audience to see that as it would be gross. That's why I like to keep them hidden under gloves :).